EPB Actuator Binding or Noise: Ohm & Amp Test Guide
You hear a grinding noise or prolonged hum from your electric parking brake actuator, which usually means the motor is overworking or gears are damaged. Normal motor hum lasts 2–3 seconds; anything beyond 5 seconds signals trouble. Disconnect the battery and remove the rear wheels to access the actuator. Check for binding by rotating the output shaft-smooth motion is critical. Use a multimeter to test resistance: 0.5 to 3.0 ohms is normal, and over 5 amps draw indicates internal issues. Apply 12 volts directly to observe extension and retraction-jerky movement or failure suggests replacement. Inspect cables for kinks and caliper slides for corrosion. Grinding noises or persistent codes like C1456 mean the actuator should be replaced. OEM units cost $180–$320, while aftermarket options range from $110–$190. If the actuator binds under power or shows gear tooth wear, don’t risk repair-replace it. Further diagnosis steps follow.
Notable Insights
- Listen for prolonged motor hum or grinding noises during operation, as these indicate binding or gear damage.
- Disconnect the battery and safely lift the vehicle to access the actuator behind the rear wheels.
- Remove wheels and caliper cover to inspect the actuator for physical damage or debris in the housing.
- Manually rotate the actuator shaft to check for smooth movement; resistance suggests internal binding or cable issues.
- Test with 12 volts and measure resistance; uneven operation or over 5 amps draw indicates a faulty actuator.
Identify Common Electric Parking Brake Actuator Noises
What does it mean when your electric parking brake starts making noise? Unusual sounds often signal internal actuator issues. A motor hum is normal during operation-it’s the 12-volt DC motor engaging the brake mechanism. You’ll hear a soft, consistent tone lasting 2–3 seconds. But if the hum grows louder or lasts longer than 5 seconds, the motor may be overworking. A gear grind, however, is never normal. It indicates worn or misaligned gears within the actuator’s gearbox, often due to debris, lack of lubrication, or mechanical fatigue. This metallic crunching occurs during engagement or release. It can coincide with error codes like C1456 or dashboard warnings. Ignoring these sounds risks complete actuator failure. You might experience uneven brake pad pressure or inability to release the parking brake. Early diagnosis prevents costly damage.
Safely Access the Parking Brake Actuator
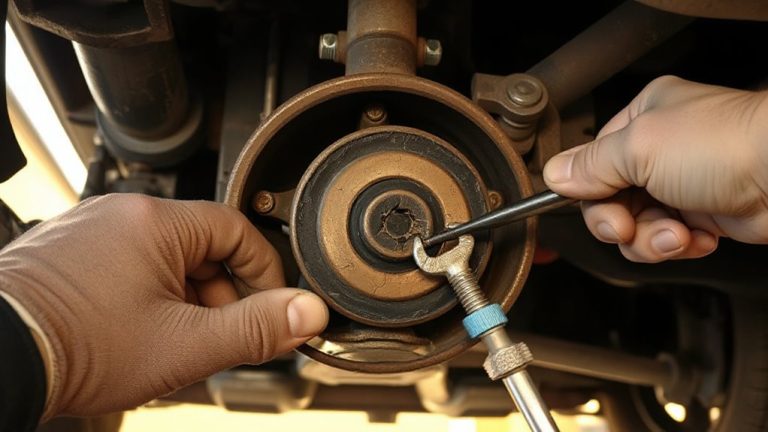
Before accessing the electric parking brake actuator, disconnect the vehicle’s battery to eliminate electrical hazards-this step is essential for safe operation. Always follow safety precautions, including wearing insulated gloves and eye protection. Lift and secure the vehicle with a hoist or jack stands rated for its weight class. Remove the rear wheels to expose the brake caliper and actuator assembly. Use proper tools-typically a Torx T30 or E8 socket-to remove mounting bolts without damaging threads. Avoid prying on wiring harnesses. The actuator usually mounts near the caliper, connected via a braided cable or lead screw. Consult service specifications for torque values when reassembling; most fasteners require 15–25 Nm. Keep the area clean to prevent debris from entering brake components. Proper tool use guarantees precision and prevents actuator damage during removal.
Check for Binding in the Actuator or Caliper
Start by manually rotating the actuator output shaft or cable mechanism to assess smooth operation. Binding indicates internal damage or misalignment. Check mounting alignment-misaligned actuators create uneven force, increasing wear. Inspect cable tension; too tight causes drag, too loose reduces braking efficiency. Both affect caliper movement and lead to noise or reduced performance.
| Issue | Likely Cause |
|---|---|
| Rough rotation | Damaged gears or debris in housing |
| Jerky motion | Improper cable tension |
| Resistance in one direction | Kinked cable or bent linkage |
| No movement | Seized mechanism or broken gear teeth |
| Excessive play | Worn internals or poor mounting alignment |
Ensure the caliper slides move freely. Binding often stems from corrosion or inadequate lubrication. Confirm all fasteners meet torque specs (typically 15–22 Nm). Use this checklist before electric testing.
Test the Actuator for Resistance and Sticking
You’ve visually inspected the actuator and confirmed the mechanical components move freely, so now it’s time to evaluate internal resistance and detect any sticking during operation. Use a digital multimeter to check for electrical continuity across the motor terminals. A reading outside 0.5 to 3.0 ohms suggests winding damage or poor connections. Apply 12 volts directly to the actuator and observe motor performance. The unit should extend and retract smoothly, without hesitation or cogging. Binding or jerky motion indicates internal gear damage or rotor stiction. Monitor current draw during operation; values exceeding 5 amps point to excessive resistance. Compare both sides if possible-mismatched operation suggests degraded internal components. Proper motor performance guarantees reliable brake engagement. Sticking or abnormal resistance compromises system function. These electrical and mechanical checks confirm whether the actuator operates within factory specifications.
Decide Whether to Replace or Service the Actuator
How do you know when an actuator needs replacement instead of repair? If testing reveals excessive resistance, grinding noises, or failure to retract fully, internal damage is likely. These symptoms often mean the motor or gearbox is worn beyond repair. You’ll need actuator replacement if diagnostic trouble codes persist after service. Consider a cost analysis: labor for disassembly and inspection takes 1.5 to 2 hours, and parts for rebuilding aren’t always available. A new OEM actuator costs $180–$320, while aftermarket units run $110–$190. Reconditioned models may save money but carry higher failure rates. Weigh long-term reliability against short-term savings. If the actuator binds under 12 volts or shows gear tooth deformation, replacement is the only safe option. Always follow manufacturer torque specs-22 Nm for mounting bolts-during installation.
On a final note
You’ve confirmed the actuator operates within spec or shows signs of failure. Normal resistance is 0.5–2.0 ohms; deviations indicate internal damage. Binding or grinding noises suggest gear wear or motor seizure. If the caliper rod moves less than 8 mm per cycle, replace the unit. Use OEM-specified torque (18–22 Nm) on mounting bolts. Failed actuators compromise safety and fail inspection. Replace in pairs if one shows premature wear.