Lubricating Steering Column Intermediate Shaft on a 2012 Toyota Sienna
You can stop your 2012 Toyota Sienna’s steering squeak by lubricating the intermediate shaft splines. Remove the steering column cover using a Phillips screwdriver and plastic trim tool. Locate the 18-inch shaft near the firewall with a splined connection and rubber boot. Apply NLGI #2 white lithium grease with a precision nozzle to the spline. Reinstall the cover and torque fasteners to 25 Nm. The noise should disappear after a lock-to-lock test. There’s more to get right for a lasting repair.
Notable Insights
- Disconnect the battery and remove the steering column cover using a 5mm Phillips screwdriver and plastic trim tool.
- Locate the intermediate shaft near the firewall, identified by its 18-inch length and splined/U-joint connections.
- Inspect the rubber boot for cracks and check the shaft for play, corrosion, or wear before lubrication.
- Apply NLGI grade 2 white lithium or molybdenum disulfide grease to the splined section using a precision applicator.
- Reassemble the cover, torque fasteners to 25 Nm, then perform a lock-to-lock test and road test for smooth operation.
Fix Your 2012 Sienna’s Squeaky Steering
Why does your 2012 Toyota Sienna’s steering squeak when you turn the wheel? The noise often stems from friction in the intermediate shaft or misalignment in the steering mechanism. A proper steering wheel alignment guarantees the front wheels respond accurately, reducing strain on the steering column. Misaligned wheels can exaggerate wear and transfer stress upward, increasing squeaks. You should also perform a suspension system check; worn control arm bushings or ball joints introduce play, contributing to noise. Inspect for uneven tire wear or drifting-signs pointing to alignment or suspension issues. Confirm the front camber is within ±0.7° and toe within ±0.15° of spec. If those values are off, realign before lubricating. Addressing these factors first guarantees the lubrication step targets the actual cause, not just the symptom.
Gather Tools and White Lithium Grease
A well-stocked toolkit makes all the difference. For proper grease application on your 2012 Toyota Sienna’s intermediate shaft, select tools that guarantee precision and safety. Use a 10mm socket wrench, 8mm socket, and a flathead screwdriver-common in most mechanic sets. Your tool selection must include a torque wrench to tighten bolts to factory specs: 25 Nm for upper column fasteners. Choose white lithium grease with a NLGI grade 2 rating and operating range from -20°F to 300°F. It resists moisture, reduces friction, and outlasts cheaper alternatives. A small, tapered grease gun or a precision applicator nozzle prevents over-lubrication. Avoid petroleum-based greases-they degrade rubber boots. Apply only enough to coat the shaft’s surface. This guarantees smooth operation without attracting dust. Proper tools and lubricant mean long-term reliability.
Remove the Steering Column Cover
Start by turning off the vehicle and removing the key from the ignition to guarantee safety while working on the steering column. Disconnect the negative battery terminal to prevent electrical shorts during the electrical wiring inspection. The steering column cover consists of upper and lower halves secured by Phillips-head screws. Remove the two 5mm screws beneath the cover using a screwdriver. Gently separate the halves by prying with a plastic trim tool to avoid damaging the finish. Check for signs of wear or abrasion on wiring harnesses during the inspection. Misaligned components can affect steering wheel alignment, so note the position of all parts before disassembly. The cover must clear the steering stalks without force. Confirm all connectors are intact and free of corrosion. Proper removal maintains unobstructed access to internal components without compromising safety or functionality.
Find the Intermediate Shaft Under the Dash
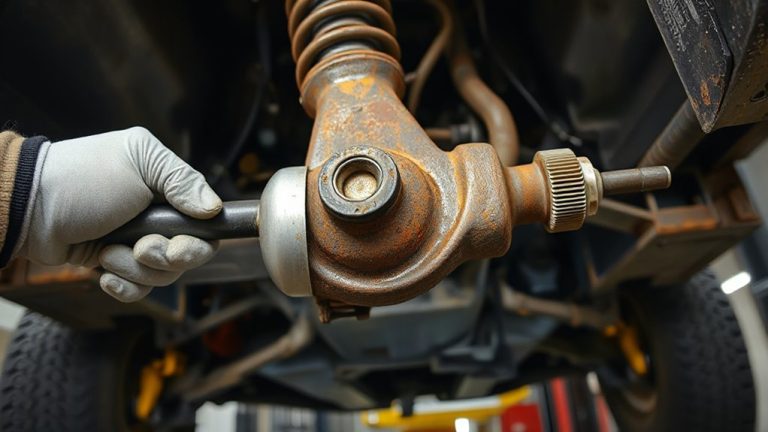
Look under the dashboard near the firewall to locate the intermediate shaft, a critical linkage connecting the steering column to the steering gear. It’s a metal rod about 18 inches long with a splined end and rubber boot near the firewall. Proper visibility guarantees accurate steering alignment and supports a complete suspension inspection.
| Feature | Detail |
|---|---|
| Shaft Length | 18 inches |
| Diameter | 0.75 inches |
| Connection Type | Splined input, U-joint output |
| Boot Material | Reinforced rubber |
Trace the steering column down from the ignition to find the shaft exiting through the firewall. The rubber boot seals against dust and moisture. Any looseness or play could affect steering precision. Check for corrosion or wear-these impact safety and performance. Maintaining this component guarantees reliable steering response and supports overall chassis integrity during inspection.
Lube the Shaft Spline and Boot
While the intermediate shaft remains exposed, it’s time to lubricate the spline and boot to guarantee smooth steering operation and prevent premature wear. Apply a liberal amount of molybdenum disulfide grease-specifically NLGI #2 consistency-to the splined section. This prevents shaft corrosion by forming a moisture-resistant barrier on the metal. Corrosion here can cause stiffness or binding, so thorough coverage is essential. Use a small brush for precision. Then, inspect the rubber boot for cracks or tears to make certain of proper boot durability. The boot shields the spline from dirt, road salt, and moisture. A compromised boot accelerates wear and invites contamination. Apply dielectric grease inside the boot’s lip before re-seating it. This enhances sealing and simplifies future removal. Proper lubrication and boot integrity maintain steering responsiveness and extend component life, reducing long-term maintenance needs.
Reinstall Cover and Test for Smooth Steering
With the intermediate shaft properly lubricated, it’s time to reinstall the steering column cover securely. Align the cover halves precisely and fasten all retaining clips and screws. Use a torque screwdriver if available-overtightening may crack the plastic. Once secured, turn the ignition to the “on” position without starting the engine. Rotate the steering wheel lock-to-lock to verify smooth operation. Any resistance or grinding indicates improper lubrication or misalignment. Check for visual play in the column, which could affect steering alignment and wheel balance over time.
| Test Phase | Action Required | Outcome Expected |
|---|---|---|
| Initial Check | Turn wheel fully left to right | No binding or noise |
| Driving Test | Drive at 30 mph on flat road | Straight tracking |
| Post-Drive | Inspect connections | No looseness or leaks |
| Alignment | Verify after 50 miles | Correct steering alignment and wheel balance |
On a final note
You’ve fixed the steering squeak by lubricating the intermediate shaft. White lithium grease reduces friction on the spline, preventing metal-on-metal contact. The boot retains the grease and blocks contaminants. Reinstalling the column cover secures wiring and restores factory appearance. Test steering through full rotation-no binding or noise confirms proper service. This fix extends shaft life and maintains smooth, reliable steering response.