Understanding Surface Preparation Requirements in Car Maintenance
You skip surface prep at your own risk-90% of paint failures happen within six months if contaminants remain. Wax, oil, or silicone prevent adhesion, while rust deeper than 0.005 inches spreads under coatings. Surface energy must hit 38 dynes/cm, and profiling to a 1.5–3.0 mil anchor pattern boosts bond strength by up to 50%. Proper cleaning, sanding, and priming aren’t optional-they’re critical. You’ll see why the next step changes everything.
Notable Insights
- Remove all contaminants like wax, oil, and oxidation to ensure proper paint adhesion and long-term durability.
- Achieve a 1.5–3.0 mil anchor pattern through surface profiling for optimal mechanical bonding of coatings.
- Clean surfaces with IPA or degreaser using a two-bucket method to prevent recontamination before painting.
- Sand with 320–600 grit paper using a dual-action sander to create feathered edges and dull surfaces uniformly.
- Apply epoxy primer only after degreasing and meeting SSPC-SP2 cleaning standards for maximum bond strength.
What Surface Prep Means for Car Paint and Coatings
Proper surface prep is the foundation of a lasting paint job or protective coating. You must remove contaminants like wax, oil, and oxidation to guarantee maximum paint adhesion. Surface profiling, typically to a 1.5–3.0 mil anchor pattern, enhances mechanical bonding. If the surface is too smooth, the coating can’t grip effectively; too rough, and it wastes material. You achieve this with 320–600 grit sandpaper or non-woven abrasives. Cleaning with isopropyl alcohol (IPA) or dedicated pre-paint cleaners removes residue. For OEM finishes, manufacturers require a surface energy of at least 38 dynes/cm for proper coating durability. Applying primers or adhesion promoters on properly abraded surfaces increases bond strength by up to 50%. Without this step, even high-quality paints delaminate prematurely under thermal cycling or UV exposure. Restoring degraded headlights often begins with thorough surface preparation, including the use of a headlight restoration kit to remove oxidation and haze.
Why Skipping Prep Leads to Costly Car Repairs
Skipping surface prep might save time up front, but it sets the stage for expensive repairs down the road. You risk paint delamination within six months when adhesion fails. Improper masking allows overspray to bond to unintended surfaces, requiring compound stripping at 1,200–2,400 rpm with a dual-action polisher. Contaminants like silicone or wax cause fisheyes, ruining finish integrity. Rust misjudgment is even costlier-failing to remove all oxidation leads to creeping corrosion beneath coatings. Surface rust extends up to 0.005 inches deep; if not abraded to bare metal at 80–120 grit, it compromises primer adhesion. Epoxy primers require SSPC-SP2 standards for hand tool cleaning to prevent underfilm corrosion. Without proper profiling, even high-build urethane paints fail within two years. You’ll face panel replacements costing $300–$800 each. Proper prep isn’t optional-it’s the foundation of lasting protection. Using a dual-action sander ensures consistent, swirl-free results when preparing car paint surfaces.
Must-Have Tools for Car Surface Preparation
A well-stocked toolkit makes all the difference when prepping a car’s surface for refinishing. You’ll need specialized tools to guarantee long-term paint protection and effective rust prevention. Precision matters-use 80–320-grit sandpaper for graded smoothing, and always pair it with a dual-action sander for even, swirl-free stripping. Below is a concise guide to essential tools:
| Tool | Purpose |
|---|---|
| Dual-Action Sander | Removes old finish without damaging metal; 5/16″ orbit pattern prevents gouging |
| DA Foam Pads | Applies polish evenly; reduces heat buildup during buffing |
| Wire Wheel Brush (Stainless) | Clears rust from seams; use at <3,000 RPM to avoid warping |
These tools deliver reliable substrate readiness. You’re not just smoothing surfaces-you’re building a defense. A properly prepped panel extends paint adhesion up to 10 years and blocks moisture intrusion, directly enhancing rust prevention and preserving paint protection over time.
How to Clean Car Surfaces Before Painting
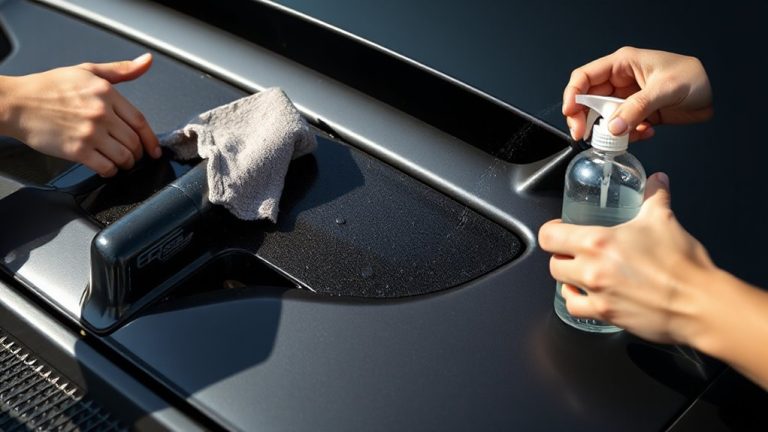
Begin surface cleaning by removing all wax, grease, and contaminants with a dedicated degreaser like isopropyl alcohol (IPA) diluted to 10% concentration or a commercial prep solvent such as wax and grease remover. Surface contamination severely compromises paint adhesion, leading to peeling or blistering. Use clean, lint-free microfiber towels and a two-bucket method: one for solvent, one for rinsing the cloth. Apply the degreaser in overlapping sections no larger than 2′ x 2′ to prevent evaporation before wiping. Allow 30–60 seconds dwell time, then wipe dry using firm pressure. Repeat the process once more for assurance-this double-clean method guarantees maximum contaminant removal. Never touch cleaned areas with bare hands; skin oils cause invisible surface contamination. Proper cleaning establishes a chemically stable surface, directly improving paint adhesion and coating longevity. Final inspection under bright, angled light reveals missed residues. For tough grease buildup, consider using a heavy-duty automotive degreaser specifically formulated for engine and undercarriage cleaning.
Sanding Techniques for Car Surface Prep
Because proper adhesion depends on surface texture as much as cleanliness, you’ll need to sand the area after degreasing. Dry sanding is the most common method, using sandpaper with grits between 320 and 600 for feathered edges and minimal dust. It cuts quickly but produces heat and fine particles that can clog pores in the paint. Use a dual-action sander with 5mm orbit for consistent, swirl-free results. For smoother finishes and reduced clogging, switch to wet sanding. This technique uses water as a lubricant and coolant, minimizing dust and preventing heat buildup. Wet sand with 600–1200 grit sandpaper and a block to maintain flat, even surfaces. Water slows cutting but improves surface uniformity. Always sand in straight lines with overlapping strokes. Wipe dry and inspect under bright light to confirm uniform dullness before moving to the next prep stage.
Using Degreasers and Primers: What, When, and Why
While cleaning alone won’t guarantee lasting paint adhesion, using the right degreaser will remove contaminants that sanding can’t reach. You must choose a degreaser compatible with your substrate-metal, plastic, or painted surfaces-because chemical compatibility prevents material damage and coating failure. Apply it before priming, using a lint-free cloth to wipe down panels thoroughly. Once clean, apply a primer suited to your topcoat; this step guarantees adhesion promotion and long-term durability. Epoxy primers offer superior corrosion resistance on bare metal, while urethane primers work well over existing finishes. Always follow manufacturer cure times-typically 30 to 60 minutes-at 70°F (21°C) and 50% humidity. Skipping either degreasing or priming compromises the entire paint system, reducing bond strength by up to 70%. Proper prep isn’t optional-it’s foundational.
Top Surface Prep Mistakes That Ruin Car Paint Jobs
Your paint job’s longevity hinges on surface prep-skip a step, and even the highest-grade urethane topcoat can fail prematurely. Improper masking leads to overspray and paint bleed, ruining clean lines. Always use 3M Blue Tape 2090 for edges; it’s designed for paint applications up to 160°F. Seal seams with crevice tools to block contaminants. You must clean with wax and grease remover twice, letting each coat flash off for 3–5 minutes. Skip sanding, and adhesion drops below 300 psi pull strength-below ASTM D4541 standards. Use P300 to P400 grit for feathering edges; anything coarser causes orange peel. After applying primer, allow full cure-rushed drying causes solvent entrapment and bubbling. Most urethanes require 16 hours at 70°F to cross-link properly. Humidity over 60% prolongs drying and raises fisheye risk. Final wipe with isopropyl alcohol removes static and oils. Prep isn’t optional-it’s the foundation.
On a final note
You must never skip surface preparation before car paint or coating. Proper prep guarantees adhesion and long-term durability. Use 80–320-grit sandpaper sequentially for smoothing substrates. Clean with isopropyl alcohol or pH-neutral degreasers to remove contaminants. Apply etch primers on bare metal; use epoxy primers for corrosion resistance. Skipping steps risks peeling, rust, and finish failure. A well-prepped surface extends paint life by up to 50%.