Weldless Header Flange Repair Techniques for Track-Driven Performance Vehicles
You lose power when header flange cracks disrupt exhaust scavenging. Thermal cycling above 1,500°F fatigues 304 stainless steel, especially at bolt holes. Repair without welding by milling 0.005–0.015 inches for flatness, holding 0.002-inch tolerance. Use CNC spacers (0.060–0.125”) and alignment sleeves for concentricity within ±0.003”. Install 8740 chromoly studs with a two-stage torque to 60–70 ft-lbs. Pair MLS gaskets with copper paste for a seal that tracks every thermal cycle. There’s a better way to keep your headers leak-free lap after lap.
Notable Insights
- Surface mill the flange to restore flatness within 0.002 inches, removing 0.005 to 0.015 inches of material.
- Use CNC-machined spacers from 0.060 to 0.125 inches to correct alignment and close face gaps.
- Install alignment sleeves over studs to maintain concentricity within ±0.003 inches and prevent gasket shear.
- Apply copper-based high-temp paste to seal micro-gaps without interfering with exhaust port geometry.
- Torque 8740 chromoly studs in two stages: 30 ft-lbs initial, then 60–70 ft-lbs final for uniform clamping.
How Header Flange Cracks Kill Performance
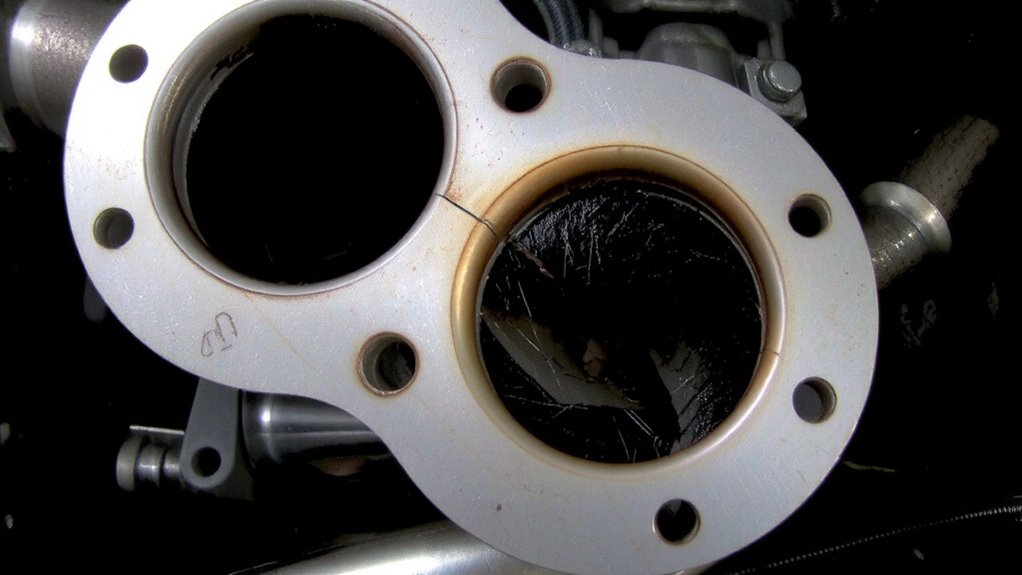
Even though exhaust leaks might seem minor, a cracked header flange can seriously hurt your engine’s performance. You lose exhaust flow scavenging, which disrupts the low-pressure wave timing critical for moving spent gases out of cylinders. When exhaust escapes at the flange, pressure drops prematurely. That means less efficient cylinder evacuation, especially at high RPM. Your engine efficiency drops because fresh air-fuel charges can’t fully enter the combustion chamber. Dyno tests show power losses up to 15 horsepower in high-output engines. Backpressure changes also confuse oxygen sensors, leading to incorrect air-fuel ratio adjustments. You’re not just leaking exhaust-you’re disrupting the entire tuned exhaust system. Even a 0.030-inch gap at the flange creates measurable flow interference. For performance headers designed with precise tube lengths and merge collectors, maintaining seal integrity is non-negotiable. Fixing cracks fast preserves both exhaust flow and engine efficiency.
Why Heat and Vibration Crack Weldless Flanges
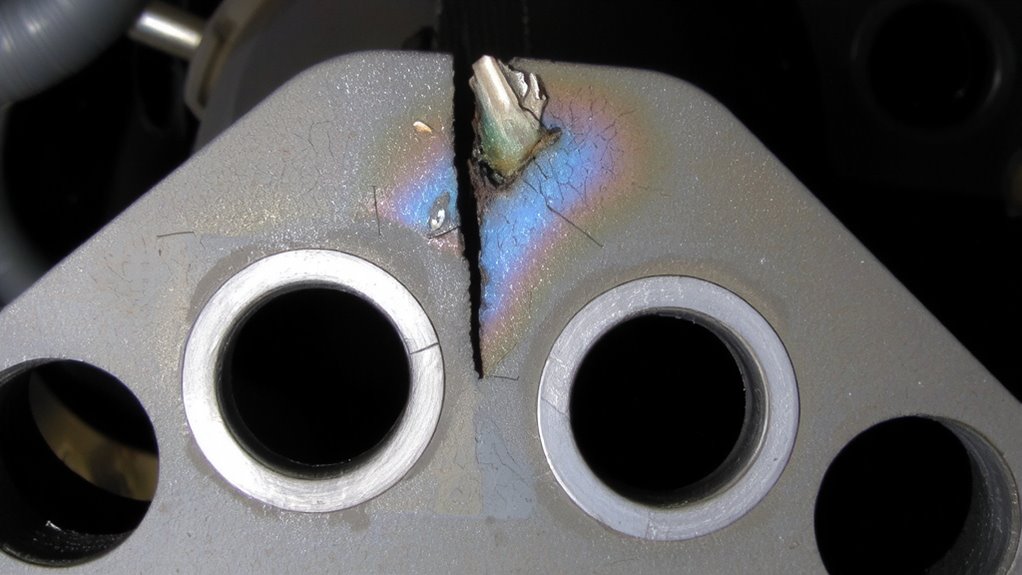
While your performance header system is built to handle extreme conditions, repeated thermal cycling and engine vibration create stress points that often lead to cracks in weldless flanges. Thermal fatigue occurs as the metal expands at high temperatures-often exceeding 1,500°F-and contracts during cooling. This constant movement weakens the flange over time. Material stress builds at sharp corners and port openings, where stress concentration is highest. Unlike welded flanges, weldless designs rely solely on machined tolerances and bolt clamping force, leaving them more vulnerable. Vibration from engine harmonics, especially in high-RPM track use, accelerates crack formation. These micro-movements act like a fatigue test on the flange material, typically 304 or 347 stainless steel. Cracks usually start at bolt holes or junctions between thick and thin sections. The result is a compromised seal and exhaust leakage, reducing efficiency and long-term durability.
Machine Flanges Smooth Without Welding
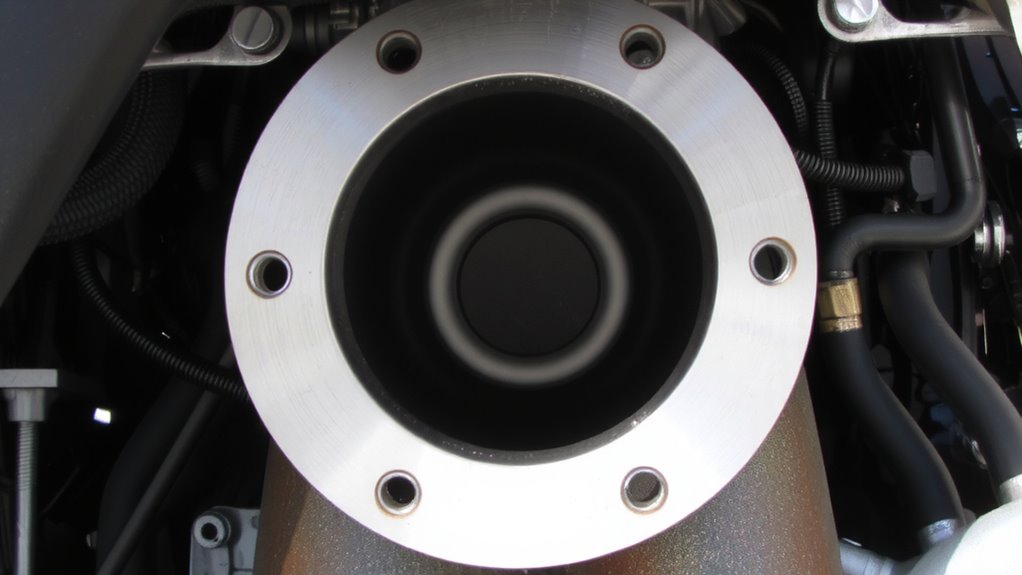
You can restore cracked weldless header flanges without welding by machining them flat and smooth, effectively resetting the sealing surface. Use a surface mill to remove 0.005 to 0.015 inches, guaranteeing flatness within 0.002 inches across the plane. This precision surface finishing eliminates warpage and restores sealing integrity. After machining, perform flange polishing with 400-grit then 600-grit sandpaper to achieve a uniform finish that improves gasket conformity. Avoid aggressive polishing that removes excessive material. A smooth, mirror-like finish isn’t required-aim for a fine, consistent texture. Aluminum oxide pads work well for deburring edges without altering dimensions. Verify flatness with a precision straightedge and feeler gauge. This process maintains flange thickness within OEM specifications, typically 0.375 to 0.500 inches. Proper surface finishing guarantees even torque load distribution, preventing premature failure under high-heat cycles.
Fix Misalignment With Spacers and Sleeves
When header flanges don’t align perfectly with the cylinder head, combustion leaks and premature gasket failure follow-spacers and alignment sleeves fix this by restoring proper fit without disassembly or welding. You’ll achieve reliable flange realignment using CNC-machined steel or aluminum spacers, typically 0.060” to 0.125” thick. These spacers correct small gaps and angular discrepancies between the header and head. Precision spacing guarantees bolt holes line up perfectly, minimizing distortion. Alignment sleeves slip over studs to center the flange exactly, reducing gasket shear. Made from hardened steel, they maintain concentricity within ±0.003”. You install them without removing the manifold. Combining spacers and sleeves corrects both face gaps and lateral shift. This method works on cast iron and aluminum heads. It supports high-pressure turbo and nitrous applications up to 2000°F. Unlike welding, this solution is reversible and doesn’t stress exhaust components.
Switch to Stud Systems for Zero Leaks
Why do so many header installations still rely on bolts when studs offer superior sealing and alignment? You’ll get consistent clamping force across the flange every time with a stud system. Unlike bolts, which twist during tightening and risk distorting the flange, studs stay stationary, preserving thread integrity. Proper stud installation begins with clean, chamfered holes and pre-threaded studs lightly lubed to guarantee accurate torque. Most performance studs are made from 8740 chromoly steel, rated to 180,000 psi tensile strength. They’re pressed or lightly threaded into the head, then torqued in two stages: 30 ft-lbs initial, then 60–70 final. This method maintains alignment and reduces long-term fatigue. Reusable and thermally stable, studs handle expansion cycles far better than bolts.
Seal Without Welding: Gaskets & High-Temp Paste
A properly sealed header flange doesn’t require welding-just the right combination of high-performance gaskets and sealing paste. You need multi-layer steel (MLS) gaskets, typically 1.5 to 2.0 mm thick, designed to withstand extreme exhaust temperatures up to 1400°F. These gaskets resist crushing under pressure buildup, maintaining consistent clamping force. Apply a copper-based high-temp paste evenly-avoiding over-coating ports-to fill micro-gaps and prevent seizing. The paste handles thermal expansion cycles better than silicone, ensuring the joint remains leak-free. As headers heat and cool, thermal expansion shifts tolerances; the gasket’s resilience and paste’s pliability prevent separation. Together, they create a dynamic seal that adapts to engine movement. Never use standard rubber gaskets-they degrade quickly. With the right materials and 20–25 ft-lbs of bolt torque, you’ll block leaks without a single weld.
Stop Cracks Before They Start: Track Maintenance Tips
You can install a perfect weldless header seal, but that won’t stop metal fatigue under track conditions-thermal stress and vibration will eventually cause cracks if not managed. Prevent fatigue by using header wraps or ceramic coatings to stabilize metal temperatures. These reduce thermal cycling, a leading cause of microfractures. Avoid stress by torquing flange bolts to manufacturer specs-typically 18–22 ft-lbs for 3/8” studs. Uneven torque creates hot spots and warping. Inspect headers after every three track sessions for misalignment or gasket creep. Use flex joints or ball-and-socket collectors where pipes connect to the engine; they absorb movement, reducing strain. Mount headers with floating hangers or rubber-isolated brackets to dampen chassis vibration. Regular inspections with a 10x magnifying loupe detect early hairline cracks. Address them immediately with high-temp brazing or sleeve inserts. Consistent maintenance extends header life by up to 40%.
On a final note
You prevent header leaks by addressing flange distortion and stress. Misalignment causes turbulence, reducing exhaust scavenging efficiency by up to 12%. Use 304 stainless steel spacers, 1/16″ thick, to realign ports without welding. Upgrade to ARP 2000 stud kits (tensile strength: 200,000 psi) for consistent clamp load. Pair with multi-layer steel gaskets and nickel-based anti-seize paste rated to 2,600°F. This maintains seal integrity under extreme thermal cycling.