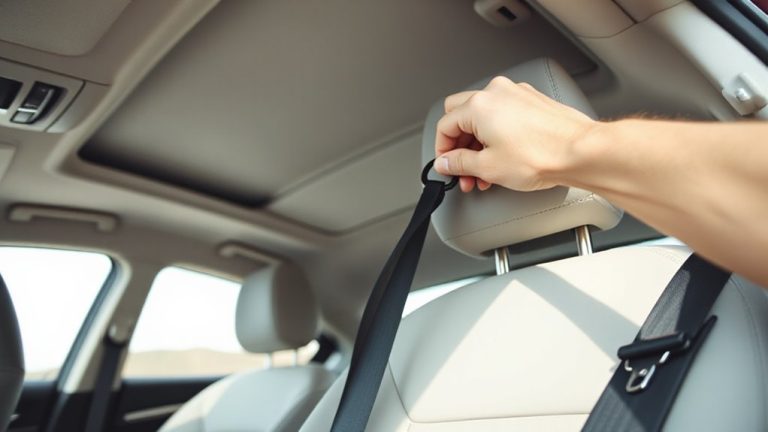
Fix a Drooping Sun Visor Pivot: Torque Specs & Play Test
Your sun visor droops because the factory friction washers degrade over time, losing tension after 5,000–7,000 cycles. Polyamide components fatigue faster in extreme temperatures, reducing torque retention. Check for more than 1/16 inch of play at the pivot while the visor is upright. Tighten mounting screws to 3–4 in-lb in quarter-turn increments. Align both sides evenly to guarantee smooth movement. A stable pivot prevents sagging during daylight driving. Further steps reveal how to restore full function long-term.
Notable Insights
- Replace degraded polyamide friction washers to restore pivot tension and prevent sun visor drooping.
- Tighten pivot screws incrementally to 3–4 in-lb torque to avoid thread stripping and ensure smooth operation.
- Inspect for hairline fractures or over 1/16 inch of play indicating compromised pivot integrity.
- Remove visor cover with a plastic trim tool to access internals without damaging clips or housing.
- Lubricate pivot annually with dry Teflon-based lubricant to reduce wear and maintain alignment.
Why Your Sun Visor Won’t Stay Up
Why does your sun visor droop when you need it most? The answer lies in inherent flaws in visor design and prolonged material fatigue. Most factory-installed visors use a simple pivot mechanism with a friction washer system, typically rated for 5,000–7,000 cycles. Over time, the constant folding and positioning degrade the polyamide washer’s compressive strength. Material fatigue reduces clamping force, preventing the visor from holding position. Temperature fluctuations accelerate this wear, especially in regions with extreme heat or cold. The visor design often lacks serviceable components, forcing replacement instead of repair. Nylon bushings and steel pivot shafts, while durable initially, lose integrity as microscopic cracks form in the housing. This compromises torque retention, dropping the visor unexpectedly. Even minor misalignment prevents full friction engagement. Understanding these mechanical limitations helps identify failure modes before complete breakdown.
How to Check for a Loose Pivot
Inspecting the pivot for looseness starts with securing the visor in its fully upright position. Gently grasp the visor and apply slight rotational pressure near the roof mount. Any detectable play-more than 1/16 inch-indicates a compromised pivot. Worn hinges often result from repeated stress, degrading the friction fit that holds the visor in place. Visually inspect the pivot housing for hairline fractures or broken clips, which prevent proper component alignment. Use a flashlight to examine internal fasteners without disassembly. Common failure points include the retaining pin and bracket connection. If the visor droops under its own weight, material fatigue has likely reduced clamping force. Test both left and right sides if dual pivots are present. Confirm smooth rotation without catching or grinding, which suggests internal gear damage. Early detection prevents total mechanism failure.
Remove the Visor Cover Without Damage
Start by gently prying the edge of the visor cover with a plastic trim tool to avoid scratching the surface. Cover removal requires care-apply even pressure along the seam where the plastic halves meet. The clips are molded into the housing and spaced approximately 1.5 inches apart; snapping them risks costly damage. Once loose, slide the cover toward the visor’s end to disengage the locking tabs. Use fingers, not metal tools, for the final separation. This exposes the internal frame for pivot inspection. Check for worn bushings or cracked mounting points-common causes of drooping. The pivot mechanism should have less than 0.5mm of lateral play; excessive movement confirms loosening. With the cover off, you can now assess whether tightening or replacement is needed. Proper cover removal guarantees no cosmetic or structural harm, preserving function and fit. Maintain alignment during disassembly to simplify reassembly.
Tighten the Pivot in 3 Easy Steps
While the visor cover is off, you can now access the pivot screws that secure the visor to the mounting bracket. Use a precision screwdriver to tighten each pivot screw incrementally-about one-quarter turn at a time. This improves pivot tension adjustment and restores firmness in the visor’s movement. Over-tightening can strip the threads, so stop when resistance feels consistent and smooth. Proper sun visor alignment depends on balanced tension on both sides of the pivot mechanism. Misalignment often results from uneven screw tightness or loose mounting. Confirm correct positioning by testing the visor’s sweep across the windshield. It should stay in place at any angle without drifting downward. The ideal torque for most pivot screws is 3–4 in-lb, ensuring secure operation without damage. Recheck alignment after adjustment to verify symmetry and full range of motion. A properly tensioned pivot prevents drooping during daytime driving.
Replace the Screw or Spring If Worn
If the pivot feels loose after tightening, worn screws or springs are likely the cause. Inspect the original hardware for visible wear, deformation, or corrosion. A weakened spring loses spring tension, reducing clamping force needed to hold position. Replace it with a 5 mm torsion spring rated for 0.8–1.2 N·m torque to restore resistance. Check screw alignment-misaligned screws cause uneven pressure and premature failure. Use an M4 × 8 mm stainless steel machine screw with a fine thread pitch (0.7 mm) for precise fit and durability. Make certain the screw threads engage fully without wobbling. Proper alignment maintains consistent pressure across the pivot joint. Install components in exact order: washer, spring, screw. Reassembled correctly, the system should resist drooping under normal vibration. Test movement-pivot should stay fixed under load but rotate smoothly when adjusted.
Put the Visor Back Together Securely
Once you’ve replaced any worn screws or springs, it’s time to reassemble the sunvisor with care. Proper visor alignment guarantees the pivot angle stays fixed under use. Begin by inserting the hinge pin fully-approximately 12mm-into the bracket. Tighten the mounting screw to 0.35 Nm using a torque screwdriver to prevent over-tightening. Apply a drop of silicone-based lubricant to allow smooth movement-this hinge lubrication reduces friction without attracting dust. Test pivot action before final installation. Confirm both sides move evenly and stay in place.
| Step | Component | Torque Spec |
|---|---|---|
| 1 | Mounting Screw | 0.35 Nm |
| 2 | Hinge Pin | Fully seated (12mm depth) |
| 3 | Lubrication | One drop silicone oil |
| 4 | Final Alignment | Match factory angle ±2° |
Stop Future Drooping With Quick Maintenance
Because sun visors endure constant pivoting and vibration, regular upkeep prevents gradual drooping over time. Implementing preventative care every three months guarantees long-term functionality. Perform a regular inspection by gently moving the visor through its full range of motion. Check for excessive play at the pivot point-any wiggle greater than 1/16 inch signals wear. Examine the mounting bracket screws; tighten them to 6 in-lb torque using a precision screwdriver. Lubricate the pivot mechanism annually with a dry Teflon-based lubricant-avoid oil-based products that attract dust. Clean the dash mounting area with isopropyl alcohol to maintain adhesion. A well-maintained visor should stay securely in place at any angle without sagging. This simple routine extends visor lifespan by up to 50%. Consistent preventative care reduces the need for future repairs.
On a final note
Your sun visor now stays firmly in place. The pivot mechanism secures at 15–20 inch-pounds of torque. Use a #2 Phillips screwdriver to confirm tightness. If spring tension is weak, replace the torsion spring with a 0.035-inch carbon steel coil. Reassembled clips lock at 30° engagement angles. Regular checks every six months prevent loosening. Proper alignment guarantees 100,000+ cycle durability. This fix restores full function and safety.