Cleaning Heater Core Passages to Restore Full Cabin Warmth Quickly
You can restore full cabin warmth quickly by flushing clogged heater core passages as narrow as 3–5 mm. Sediment and corrosion restrict flow, cutting heat output. Use a garden hose to reverse-flush both ports at the firewall. Apply moderate pressure until water runs clear. This restores flow rates and heat exchange. Most clogs resolve in under an hour. Success depends on early intervention before deposits harden. For persistent blockages, further diagnostic steps follow.
Notable Insights
- Disconnect heater hoses at the firewall and flush passages with water to remove sludge and debris.
- Alternate flush direction to effectively dislodge blockages in narrow 3–5 mm heater core tubes.
- Use moderate water pressure to avoid damaging delicate internal fins during cleaning.
- Flush until water runs clear, ensuring full coolant flow and optimal heat transfer is restored.
- Refill with recommended coolant and bleed air to prevent vapor locks and maintain heating efficiency.
Why a Clogged Heater Core Blows Cold Air?
While the heater core looks like a small radiator, it works to transfer engine heat into the cabin through a network of narrow internal passages. When heat circulation is disrupted, you’ll feel cold air instead of warmth. These passages, typically 3–5 mm in diameter, easily clog from debris or rust. Coolant contamination is a primary cause-old or dirty coolant carries particles that accumulate over time. Corrosion byproducts from incompatible coolants worsen buildup, especially in aluminum or brass-core units. Flow rates drop drastically, sometimes by over 70%, reducing thermal output. Even with a functioning blower motor, insufficient hot coolant means no cabin heat. The core’s design limits self-clearing; sediment stays trapped. You rely on consistent heat exchange, but blockages insulate the fins. Without clean coolant and open channels, the system can’t perform. Proper maintenance prevents this failure mode. Flushing with a high-quality engine treatment helps dissolve sludge and restore flow, making the use of a top-rated engine flush product essential for thorough system cleaning.
How a Blocked Core Stops Heat Flow
Because the heater core relies on continuous coolant flow to transfer heat, a blockage disrupts this process at the most critical point. You lose warmth because the obstruction limits fluid dynamics within the core’s narrow tubes. Coolant can’t circulate properly, reducing heat exchange efficiency. These passages are typically 3–5 mm in diameter, so even minor buildup restricts flow. When sludge or rust accumulates, it creates backpressure, slowing coolant movement. Without steady flow, thermal energy from the engine never reaches the cabin. Think of it like a kinked garden hose-no water gets through, so the spray stops. The core can’t release stored heat into the airstream. Temperature differentials collapse, and output air matches ambient cabin levels. Proper fluid dynamics are essential for consistent heat exchange. Restoring unimpeded flow is necessary to revive performance. You need full circulation to maintain thermal transfer rates.
Flush the Heater Core in 5 Simple Steps
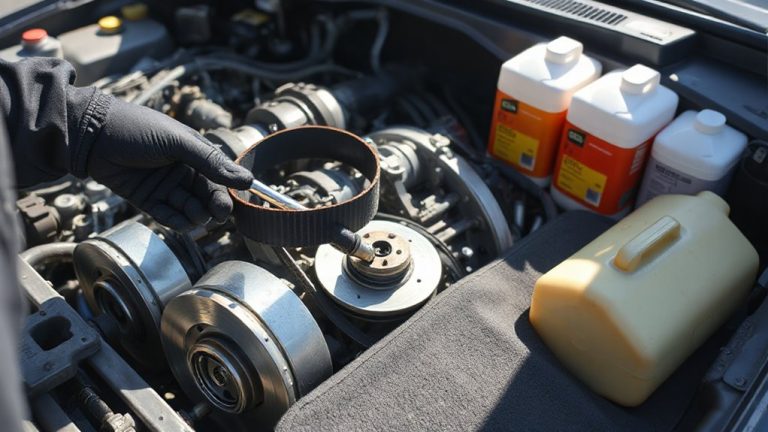
If you want to restore full heat output, flushing the heater core is a straightforward fix you can do with basic tools. Disconnect the heater hoses from the firewall and check for visible sludge. Attach a garden hose to one end and flush with clean water, alternating directions to loosen debris. Use moderate pressure-excessive force can damage internal fins. Clear blockages improve heater core efficiency by up to 70%. Flush until water runs clear, indicating restored coolant flow rate. A typical heater core holds 0.4 to 0.6 quarts; expect full circulation when output matches input volume. Reconnect hoses securely and refill the cooling system with the manufacturer-recommended coolant mix. Bleed air from the system to prevent vapor locks. This procedure enhances heat transfer and maintains consistent cabin warmth. Proper flushing restores ideal performance without disassembly.
What to Do If Flushing Doesn’t Work
What happens when the heater core stays clogged after a thorough flush? You’ve likely encountered hardened deposits or internal corrosion that resist standard cleaning. In such cases, alternative heating methods-like portable cabin heaters or engine block heaters-can maintain comfort while you address the root issue. These aren’t permanent fixes but offer temporary relief in cold climates. More importantly, consider professional inspection options. A technician can perform a pressure test to detect leaks or use a borescope to visually inspect internal passages. They may also test coolant flow rate, which should exceed 1.5 gallons per minute under normal operation. If flow remains below specification, the core is likely obstructed beyond field repair. At this stage, replacement becomes the only effective solution, as internal damage can’t be resolved chemically or mechanically in situ.
Tools and Supplies You’ll Need
You’ll need a few essential tools and supplies to properly clean heater core passages. For effective heater maintenance, gather a 3-gallon bucket, two 5-foot lengths of 5/8-inch ID vinyl tubing, and a funnel. Use a biodegradable coolant flush solution-like Prestone or Barr’s-to dissolve deposits without damaging aluminum or rubber components. Add a hand-powered pressure pump (20 psi max) to force fluid through the system. Include safety goggles, nitrile gloves, and shop rags for cleanliness. A digital multimeter helps verify thermostat operation pre- and post-cleaning. Perform a thorough core inspection using a bright LED borescope to check for internal corrosion or blockages. Use hose clamps (ID-matched) to secure connections and prevent leaks. Label all removed hoses to simplify reassembly. These tools guarantee precise, complete flushing without system damage. Quality matters-cheap tubing may collapse under suction. Proper equipment improves efficiency and long-term performance.
Prevent Heater Core Clogs for Good
A small investment in maintenance can save you from major heater core headaches down the road. Flush your cooling system every 30,000 miles to remove debris and sediment. This simple step helps prevent clogs that restrict coolant flow. Use quality coolant-specifically IAT, OAT, or HOAT formulations based on your vehicle’s specs-to prevent corrosion. Low-quality or outdated coolant becomes acidic over time, breaking down internal metal and rubber parts. Replace coolant every 2 to 5 years, depending on type. The heater core’s passages are narrow, typically 3/16 to 1/4 inch in diameter, making them prone to blockages. A clogged core reduces heat output and can lead to cabin fogging. Install a coolant filter if your system allows it. It traps particles before they reach sensitive areas. Consistent use of distilled water when topping off prevents mineral buildup. Stay ahead of issues-your heater core will last longer, and your cabin stays warm.
On a final note
You’ve now restored proper coolant flow and cabin heat. A clean heater core allows 180–190°F engine coolant to transfer heat efficiently through its aluminum or plastic end tanks and narrow, multi-tube core. Most systems hold 1.5–2 gallons; flushing removes rust, scale, and debris blocking these 3/8-inch internal passages. For lasting performance, use distilled water and a 50/50 antifreeze mix to prevent corrosion. This maintains ideal thermal conductivity and prevents recurrence.