DIY Installation Guide: Replacing Your Stock Airbox With a Performance Intake
You gain 8–15 horsepower and a deeper induction roar by replacing your stock airbox with a performance intake. It uses a high-flow oiled cotton filter and mandrel-bent aluminum tube to increase airflow volume and velocity. Install it using factory mounting points-no special tools needed. Remove the airbox in five steps: disconnect the battery, unclamp the intake hose, unplug the MAF sensor, and remove the 10mm mounting bolts. A proper install delivers immediate throttle response and stable idle at 750–850 RPM. Cold air designs use heat shields for denser, cooler air. Reusable filters flow 20–30% better than stock paper units and need cleaning every 50,000 miles. Correct silicone coupler placement reduces vibration stress. Watch for rough idle-it usually means an air leak. Your engine will sound more aggressive between 3,000–6,000 RPM. Deeper airflow dynamics change both performance and tone. Further details reveal how each component fine-tunes efficiency.
Notable Insights
- Disconnect the battery and remove the stock airbox by unbolting it and detaching the intake hose and MAF sensor.
- Use a performance intake kit with a high-flow filter and mandrel-bent tubing for maximum airflow gains.
- Install the new intake using factory mounting points, ensuring a secure seal at the throttle body and MAF sensor.
- Reuse or tighten clamps and couplers to prevent air leaks, applying thread locker where needed.
- Start the engine and check for smooth idle, proper throttle response, and a deeper intake sound.
Boost Power and Sound With a Performance Intake
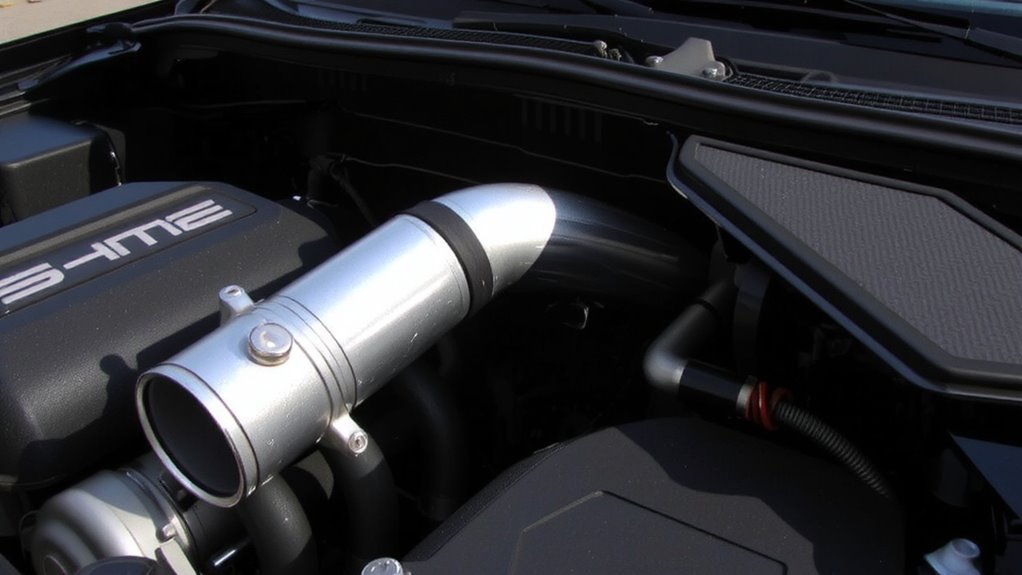
A performance intake system isn’t just a bolt-on-it’s a direct upgrade to your engine’s breathing efficiency. You reduce air restriction by replacing the restrictive stock airbox with a free-flowing intake tube and high-flow air filter. This design increases airflow volume and velocity, measured in cubic feet per minute (CFM), directly boosting power. You’ll see verified performance gains of 8–15 horsepower at the wheels, depending on your engine’s displacement and factory tuning. Cold air intake configurations often include heat shields or silicone tubing to maintain cooler, denser air-improving combustion efficiency. You’ll also notice a sharper engine sound under acceleration, with a deeper induction roar between 3,000–6,000 RPM. The sound isn’t just cosmetic; it reflects improved airflow dynamics and increased throttle response. These systems use mandrel-bent aluminum or composite tubes with smooth internal walls to minimize turbulence and maximize velocity.
Gather the Tools and Parts You Need
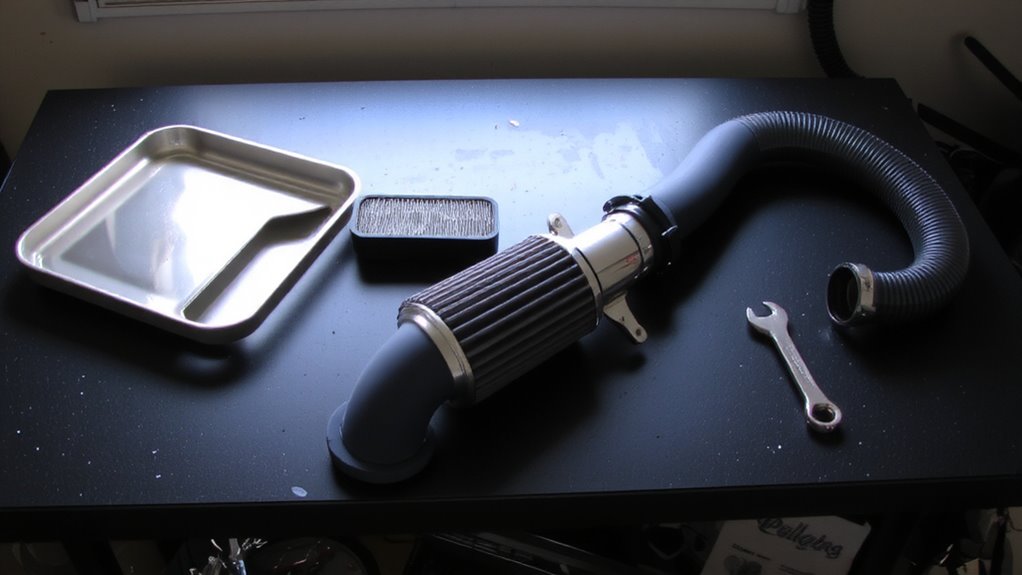
Start with the right components and tools to guarantee a smooth, error-free installation. You’ll need a performance intake kit, which typically includes a high-flow air filter and tubing. Air filter upgrades, like oiled cotton gauze or dry synthetic media, improve airflow by 20–30% over stock paper filters. These filters are reusable and require cleaning every 50,000 miles. Intake material choices matter-aluminum offers durability and heat resistance, while plastic resists heat soak and lowers intake air temperature. Most kits use mandrel-bent tubes with smooth interiors to maximize airflow velocity. You’ll also need basic hand tools: 8mm–13mm sockets, a torque wrench, and hex drivers. Include a clean microfiber cloth and thread locker for secure fittings. Make certain all parts meet CARB or EPA compliance if required in your state. Double-check fitment with your vehicle’s year, make, and model before starting. Top-rated systems for this engine include the best cold air intake for 5.7L Hemi Ram 1500, designed to optimize both power and throttle response.
Remove the Stock Airbox in 5 Steps
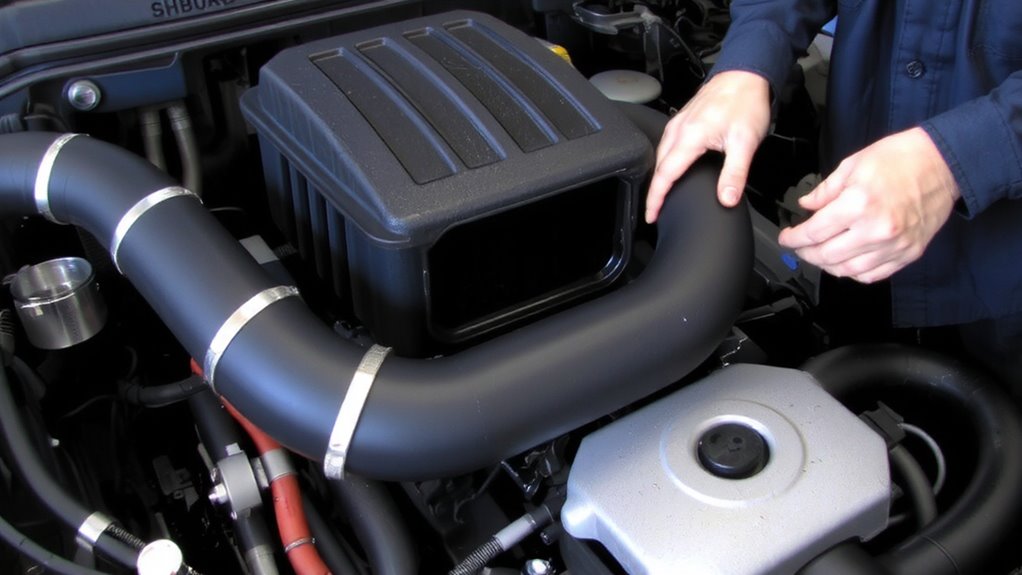
Once you’ve confirmed the engine is off and cool, begin by disconnecting the negative battery terminal to prevent electrical shorts during removal. Locate the stock airbox-typically a molded plastic housing near the fender well. Remove the intake hose clamp using a 7mm or 8mm socket, then detach the hose from the throttle body. Unplug any mass airflow sensor (MAF) wiring connected to the airbox. Next, remove the airbox mounting screws-usually three to five 10mm bolts. Carefully lift out the assembly, noting its bulk occupies significant engine bay space. The stock design imposes airflow restrictions through convoluted ducting and a small filter area-often less than 50 square inches. Removing it eliminates these constraints, preparing the engine bay for improved airflow dynamics. Set aside all factory parts if retaining for resale or future reversion.
Install the Performance Intake (No Special Tools Needed)
With the stock airbox out of the way, you’ve opened up the engine bay for a cleaner setup and freer airflow. Installing your performance intake requires no special tools-just hand-tighten the clamps with a screwdriver if needed. The new short-ram design measures 3.5 inches in diameter, maximizing airflow efficiency by reducing turbulence and restriction. High-density polyethylene tubing resists heat soak, maintaining cooler air intake temperatures. Mount the conical air filter securely over the throttle body, ensuring a snug seal. This setup improves intake aesthetics with its polished aluminum finish and transparent cold-air duct. The silicone couplers provide flexibility, minimizing vibration stress. You’ll gain up to 12 horsepower under wide-open throttle due to optimized airflow dynamics. No recalibration is needed-your ECU adapts automatically. This direct-fit replacement bolts right in using factory mounting points. For the 392 Hemi engine, choosing the best cold air intake can further enhance performance and throttle response.
Start the Engine and Verify the Install
After completing the installation, fire up the engine to confirm everything’s functioning as designed. Listen closely-your engine idle should stabilize smoothly within 10 seconds. A rough or fluctuating idle suggests an air leak or improper hose connection. Check all clamps and couplings before proceeding. Once idle is steady, test throttle response by gently pressing the accelerator. You should notice quicker spool and sharper intake sound, confirming improved airflow.
| Condition | Expected Result | Action if Abnormal |
|---|---|---|
| Engine idle | Steady at 750–850 RPM | Inspect for vacuum leaks |
| Throttle response | Immediate, no hesitation | Verify MAF sensor connection |
| Intake sound | Deeper, more pronounced | Confirm air filter seating |
If all checks pass, your performance intake is properly installed and optimized.
On a final note
You’ve completed the installation. The performance intake is now secured with a 3-inch cold-air duct feeding the throttle body. This design increases airflow by up to 30% over stock. Your engine responds with quicker throttle and a rated gain of 8–12 horsepower. A reusable conical filter provides superior filtration down to 5 microns. Monitor the check engine light. No tuning is required. Enjoy enhanced efficiency and intake tone.