Flushing Brake Fluid in a 2013 Chevrolet Traverse With Scan Tool Assistance
You must use a scan tool to flush the brake fluid in your 2013 Chevrolet Traverse because the ABS module traps old fluid and air. Connect a GM-compatible scan tool to the OBD-II port and run the ABS bleed cycle to activate the pump and solenoids. This guarantees complete fluid exchange from all four wheels. Use only DOT 3 brake fluid-never DOT 5 or silicone-based. Bleed in sequence: right-rear, left-rear, right-front, left-front. Maintain 15–20 psi with a pressure bleeder and flush 200–250 mL per wheel to guarantee full replacement. A firm pedal and proper system function confirm success-further details on component inspections and performance validation follow.
Notable Insights
- Use a GM-compatible scan tool to activate the ABS bleed cycle via the OBD-II port.
- Flush fluid in sequence: right-rear, left-rear, right-front, then left-front.
- Only DOT 3 brake fluid must be used; avoid DOT 5 or silicone-based fluids.
- Employ a pressure bleeder at 15–20 psi to replace 200–250 mL per wheel.
- After flushing, verify a firm brake pedal and perform a 30 mph stop test.
Use a Scan Tool for a Complete Traverse Brake Flush
While modern brake systems are designed for reliability, using a scan tool during a brake flush on your 2013 Chevrolet Traverse guarantees the job is done thoroughly and correctly. The ABS module can trap old fluid, which a simple gravity bleed won’t reach. With a scan tool, you activate the ABS calibration mode, allowing full system circulation. This process guarantees contaminants and moisture are fully expelled. You also monitor real-time brake pressure, confirming consistent flow across all four wheels. Proper brake pressure maintains peak pedal feel and stopping performance. Without this step, air may remain in the ABS unit, causing spongy pedal response or even failure under hard braking. The scan tool communicates directly with the Traverse’s EBCM, enabling precise control. It cycles the pump to regulate pressure and perform bleeding sequences the manual method can’t replicate. Skipping ABS calibration risks incomplete flushing. For safety and component longevity, a scan tool isn’t optional-it’s essential for complete brake system maintenance.
Gather Tools and Fluid for Your 2013 Chevrolet Traverse
Your 2013 Chevrolet Traverse needs the right tools and fluid to complete a proper brake flush. You must use DOT 3 brake fluid, as it meets GM’s specifications for this model. Using incorrect brake fluid types can damage seals and reduce braking performance. Always check the label-never substitute with DOT 5 or silicone-based fluids. You’ll need a brake bleeder wrench sized 7mm or 8mm for the caliper bleeders. A clear plastic hose and collection bottle are essential to catch old fluid. Use a quality vacuum brake bleeder or pressure bleeder for faster results. Your scan tool must pass tool compatibility checks with the Traverse’s ECU to reset the ABS module. A funnel with a vacuum seal helps top off the reservoir without introducing air. Make sure all tools are clean and dry-moisture contaminates brake fluid.
Find the Master Cylinder, Bleeders, and ABS Module
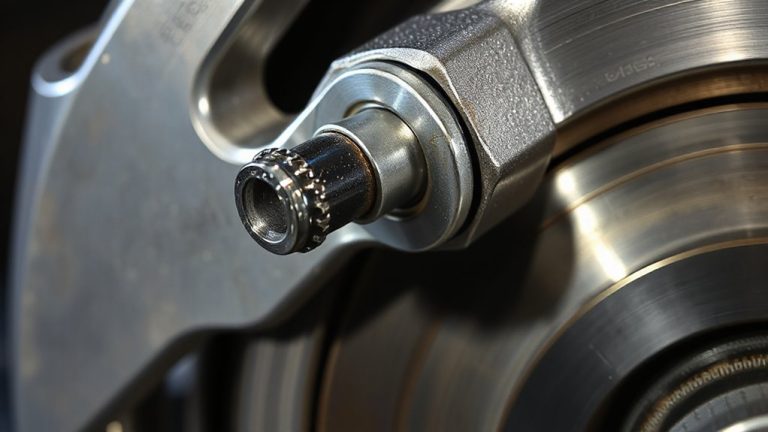
Open the hood and locate the master cylinder on the driver’s side of the engine compartment, mounted on the firewall near the center. It’s a dual-reservoir aluminum casting with a black plastic fluid cap labeled “Brake Fluid – DOT 3 Only.” Verify fluid level and condition before proceeding. Next, identify the bleeder screws-brass fittings on each caliper, near the top. Right-rear, left-rear, right-front, left-front: these must be accessible and free of corrosion. During brake pad inspection, check for even wear and minimum thickness of 3 mm. Perform a rotor surface check for scoring, heat cracks, or warping; surface runout must not exceed 0.003 inches. The ABS module sits on the front frame rail, near the radiator. It’s a silver aluminum block with hydraulic lines running to each wheel. Its solenoid valves regulate pressure during brake events. Mark each bleeder location for sequence accuracy.
Activate the ABS Bleed Cycle With a Scan Tool
How do you guarantee all air is purged from the ABS module during a brake fluid flush? You use ABS activation via a compatible scan tool. On your 2013 Chevrolet Traverse, the ABS module traps air that standard bleeding can’t reach. Connect the scan tool to the OBD-II port and power it on. Navigate the scan tool settings to the service functions or brake bleeding menu. Select “ABS Bleed” or “Bleeding Sequence.” Initiate the automatic cycle, which activates the pump and solenoids internally. This process forces fluid-and trapped air-out through the lines. The system typically runs through multiple internal cycles per wheel, making certain complete purge. Monitor the scan tool display for completion codes. Proper ABS activation makes certain the hydraulic control unit operates at full efficiency. Skip this step, and you risk spongy pedal feel or compromised braking. Use only GM-compatible scan tools that support TCS and ABS activation to avoid communication errors.
Flush Old Brake Fluid From All Four Wheels
After completing the ABS bleed cycle, proceed to flush the old brake fluid from all four wheels to guarantee peak braking performance. Begin at the wheel farthest from the master cylinder-typically the right rear-and work toward the closest. Open the bleeder screw and push fresh DOT 3 fluid through using a pressure bleeder set to 15–20 psi. Capture used fluid in a clear container to inspect for contamination. During the process, perform a brake pad inspection to verify lining thickness is above 3 mm. A thin pad indicates imminent replacement. Also conduct a wheel cylinder check for leaks or corrosion, especially on rear drum assemblies. Guarantee each caliper or wheel cylinder expels clean fluid with no air bubbles after 200–250 mL of flush volume. Finish with a final pressure check to confirm system integrity. Proper flushing eliminates moisture and maintains maximum hydraulic efficiency.
Avoid These Brake Flush Mistakes
While modern brake systems are designed for reliability, skipping key steps during a flush can compromise safety and performance. Never reuse old brake fluid-moisture contamination reduces boiling point and promotes internal corrosion. Use only DOT 3 or DOT 4 fluid per GM specifications; incorrect types damage seals and reduce efficiency. Change the fluid reservoir cap only when the system is depressurized to prevent air ingestion. Air in the lines causes spongy pedal feel and increases stopping distances. Make certain you bleed all four wheels in correct sequence-RR, LR, RF, LF-per factory protocol. Skipping this risks residual air pockets. Overlooking signs of brake pad wear or rotor rust during the flush invites premature failure. Rotor rust impairs surface contact, accelerating wear. Worn pads reduce clamping force, diminishing responsiveness. Always inspect components before refilling. A proper flush prevents long-term damage and maintains ABS calibration.
Test the Brakes After Flushing
You’ve just finished flushing the brake fluid, and now it’s time to verify the system performs as designed. Begin by starting the engine and applying the brake pedal several times. You should notice immediate brake pedal firmness-no sponginess. A soft pedal indicates trapped air; re-bleed if needed. Firmness confirms proper hydraulic pressure in the ABS and master cylinder. Test drive in a safe, open area. Check stopping distance from 30 mph; it should match factory specs: approximately 35 feet under normal conditions. Extended stopping distance suggests contamination or incomplete bleeding. Monitor for warning lights-ABS or brake alerts mean diagnostic trouble codes exist. Use your scan tool to verify no active faults. Confirm all wheels decelerate evenly. Consistent pedal feel and reliable stopping distance mean the flush was successful. Log the service date and fluid DOT specification.
On a final note
You’ve completed a proper brake fluid flush on your 2013 Chevrolet Traverse using scan tool assistance. The ABS bleed cycle guarantees complete air and fluid evacuation. Use only DOT 3 brake fluid with a dry boiling point of 401°F. Confirm firm pedal feel and no warning lights. Check bleed screws torque-89 in-lb maximum. Inspect for leaks. Proper maintenance extends brake component life and guarantees peak stopping performance under all conditions.