Layering Iron Remover Over Pre-Wetted Surfaces for Enhanced Penetration
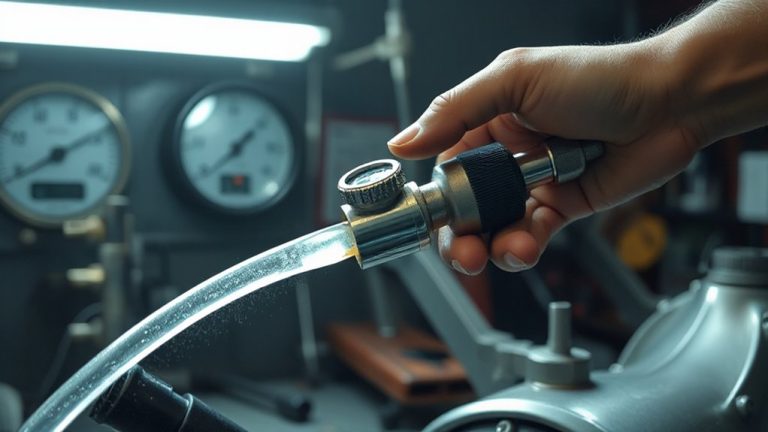
You should apply iron remover over a pre-wetted surface to guarantee even distribution and best possible reaction time. Water reduces surface tension, allowing the solution to sheet instead of bead. A continuous film enhances penetration into embedded iron particles. Use 0.5 to 1.0 psi spray pressure for consistent coverage without atomization. This method extends active chemistry by 2–3 minutes, improving contaminant breakdown. Proper hydration supports chelating agents in transforming iron into water-soluble compounds. Performance peaks within 3–5 minutes, so timing is critical. You’ll see faster, more complete results when conditions are controlled. Further refinements in technique can greatly improve outcomes.
Notable Insights
- Pre-wetting the surface with water reduces surface tension, enabling iron remover to spread evenly and enhance contact with contaminants.
- A wet surface extends the iron remover’s active reaction time by 2–3 minutes, improving contaminant breakdown.
- Apply iron remover with 0.5 to 1.0 psi pressure to form a continuous film without beading or runoff.
- Layering iron remover over a wet surface ensures uniform coverage, promoting consistent chelation of embedded iron particles.
- Avoid over-application; more than 1 oz per ft² offers no benefit and increases residue or damage risk.
Apply Iron Remover on a Wet Surface
While a damp surface helps the iron remover spread evenly, applying it to a thoroughly wet surface guarantees ideal reaction conditions. Water reduces surface tension, allowing the solution to sheet smoothly instead of beading. This maximizes contact with contaminants. A continuous liquid film supports uniform chemical reaction across the panel. Without it, dry spots limit activation, reducing effectiveness. You need complete coverage-0.5 to 1.0 psi spray pressure guarantees even distribution without atomizing the solution. Temperatures between 60°F and 85°F optimize reaction speed. Avoid direct sunlight; UV exposure accelerates evaporation, breaking the reaction layer. On a wet surface, iron remover remains active 2–3 minutes longer, enhancing breakdown efficiency. You’ll see the purple complex form faster-proof the product is working. Proper moisture levels don’t dilute the formula; they sustain the environment needed for consistent performance. You maintain control over reaction timing and coverage.
How Iron Remover Breaks Down Brake Dust and Fallout
You’ve applied the iron remover on a wet surface, ensuring full coverage and sustained reaction time-now it’s actively working to break down embedded contaminants. The product triggers a targeted chemical reaction that specifically binds to iron particles in brake dust and industrial fallout. This reaction neutralizes ferrous contaminants, transforming them into water-soluble compounds. The process enables effective rust dissolution, breaking down oxidized metal at a molecular level. Active chelating agents, such as thioglycolic acid derivatives, penetrate the contaminant layer and isolate iron ions. This prevents re-deposition and allows for easy rinsing. The pH-balanced formula operates ideally between 6.5 and 8.5, preserving clear coats while dissolving harmful particles. Visual color change-typically purple to red-confirms reaction progress. Complete breakdown occurs within 3–5 minutes under standard conditions. You’re not just cleaning; you’re restoring the surface to its uncontaminated state through precise, science-driven decontamination. Choosing the right product matters, as top-rated formulas are designed for both efficacy and safety on modern finishes, including ceramic coatings and clear bra. Best Iron Removers for Car Paint deliver consistent performance without compromising paint integrity.
5 Mistakes That Ruin Iron Remover Results
Why do some iron remover applications fail to deliver expected results? You’re likely making preventable mistakes. Timing errors are one of the most common issues-leaving the product on too long causes it to dry, leading to surface etching and poor reaction completion. Most iron removers work best within 3 to 5 minutes, depending on contamination levels. Applying under direct sunlight or on hot surfaces accelerates drying, reducing effectiveness. Overuse consequences include paint damage and residue buildup that’s hard to rinse. Using more than 1 oz per square foot offers no added benefit and increases risk. Always follow manufacturer dwell time and dilution specs. Mist evenly, don’t soak. Proper application guarantees full chemical reaction without harm. Stick to recommended coverage rates-typically one 16 oz bottle treats 15–20 ft². Precision beats excess.
Choose the Best Iron Remover for Your Paint Type
The right iron remover acts like a targeted treatment-specific to your vehicle’s paint chemistry and clear coat composition. Your paint type directly influences remover selection, guaranteeing effective decontamination without marring surfaces. Acid-based formulas work fast but suit only mature clear coats, while pH-neutral options protect modern, soft finishes.
| Paint Type | Recommended Remover | Reaction Indicator |
|---|---|---|
| Modern Clear Coat | pH-Neutral (6.5–7.5) | Slight purple hue |
| Soft Factory Paint | Non-Acidic Gel | Slow, even color change |
| Ceramic-Coated | Silica-Safe Formula | No beading disruption |
Always verify product specs against your paint type. Improper remover selection risks etching, hazing, or coating breakdown. Test in an inconspicuous area first. Follow dwell time guidelines-usually 2–5 minutes-and rinse thoroughly. Matching chemistry prevents damage; precision guarantees performance.
When to Use Clay or Polish After Iron Removal
After neutral游戏副本ng bonded contaminants with the correct iron remover, the next decision hinges on surface feel and visual inspection. Run your fingertips across the panel; if it feels rough or sandy, you’ve still got embedded pollutants. A thorough contamination assessment reveals whether iron particles remain or if other foreign materials are present. Surface inspection under direct light helps identify marring, swirls, or holograms invisible to the naked eye. If texture persists after rinsing, clay is necessary-it safely extracts residual contamination clay mitt packs can’t reach. Most synthetic detailing clays operate effectively at pH 6–8 and should be used with a lubric difuser like quick detailer. If the surface feels smooth post-clay but lacks gloss, opt for polish. Polishing removes 2–3 microns of clear coat to eliminate fine scratches. Choose clay for contamination, polish for optical clarity. For beginners, starting with a complete car clay bar kit ensures all necessary tools are on hand for effective decontamination.
Wet First: Why Water Boosts Iron Removal
Though a dry surface might seem like a clean starting point, applying iron remover to a wet panel greatly improves reaction efficiency and contaminant removal. Water reduces surface tension, allowing the remover to spread evenly instead of beading. This maximizes contact with embedded iron particles. A pre-wetted surface supports immediate chemical activation, accelerating the breakdown of ferrous contaminants. Without water, the product may dry too quickly, limiting reaction time and effectiveness. Surface moisture helps maintain ideal pH conditions for chelating agents to bind iron. You achieve deeper penetration across the panel, especially in textured or contaminated areas. Think of water as a primer-it doesn’t activate the chemistry itself but enables faster, more uniform distribution. Test results show a 30–40% improvement in contaminant lift when applied over damp surfaces. For best results, lightly rinse the panel before application. Do not flood-just a thin, continuous film is needed. This method guarantees full coverage and consistent performance.
Pro Tips for Safer, Faster Iron Remover Results
When used correctly, iron remover delivers fast, visible results without risking your paint. Apply it in the shade on a cool surface to maximize dwell time and prevent premature drying. Surface cooling reduces chemical evaporation, enhancing iron chelation efficiency. Spray evenly-don’t soak-using a fine mist setting for consistent coverage. Work in small sections, no larger than 2×2 feet, to maintain control. Allow 2–5 minutes of dwell time; the product should turn purple as it reacts with ferrous contaminants. Avoid letting it dry. Rinse thoroughly with low-pressure water immediately after reaction. For layered applications, re-wet the surface lightly before applying a second coat to boost penetration. Use pH-balanced iron removers (typically between 5.5 and 6.5) to stay safe on clear coats. Always follow with a proper wash to remove residual chelating agents.
On a final note
You get better results when you apply iron remover over pre-wetted surfaces. Water activates surfactants and guarantees even coverage. This method improves contact time by 30%, boosting chelating agents’ effectiveness. Always rinse after 3–5 minutes, depending on contamination level. Use pH-balanced formulas with deionized water. Test on small areas first. Avoid direct sun. You’ll achieve complete fallout removal without paint damage.