Step-by-Step Guide to Sealing Trunk Latch Mechanisms
You can fix a loose trunk latch by first checking cable alignment and ensuring no slack disrupts the release mechanism. Inspect the latch for cracks, rust, or misalignment exceeding 2 mm. Clean all components with isopropyl alcohol and a lint-free cloth. Apply a silicone-based lubricant that operates from -40°F to 350°F. Seal the assembly with an EPDM rubber boot rated IP67 and use silicone sealant with 40–50 Shore A hardness. Confirm the latch clicks firmly and maintains a 3–5 mm gap. A secure, quiet closure means you’ve properly protected the mechanism-and there’s still more to optimize.
Notable Insights
- Inspect the latch mechanism for corrosion, debris, and misalignment before beginning any sealing procedure.
- Clean all latch and hinge components thoroughly using isopropyl alcohol and a lint-free cloth.
- Ensure striker plate alignment is within 1–3 mm gap to prevent sealing and closure issues.
- Apply silicone-based sealant to latch mounting points and edges, using a tube rated for extreme temperatures and UV resistance.
- Install an IP67-rated EPDM rubber boot seal and lubricate moving parts with residue-free silicone spray.
Fix a Loose Trunk Latch in 7 Steps
Why is your trunk latch feeling loose or failing to secure properly? A common cause is misaligned cable alignment, which prevents the latch from engaging fully. Inspect the cable connecting the release handle to the latch mechanism; it should move smoothly without slack. Excess play disrupts actuation, leading to inconsistent closure. Adjust the cable tension at the anchor point near the trunk floor, ensuring minimal resistance during operation. Also, damaged trunk insulation can allow moisture ingress, accelerating corrosion in the latch assembly. Remove deteriorated insulation and verify the surrounding panel is dry before proceeding. Realign the striker plate with the latch-horizontal and vertical gaps should measure between 1–3 mm. Secure mounting bolts to 8–10 ft-lbs torque. Proper cable alignment and intact trunk insulation are critical for reliable, weather-resistant trunk sealing.
Gather Your Tools and Supplies
You’ll need seven essential tools and a few specialized supplies to properly seal trunk latch mechanisms. Correct tool selection guarantees efficiency and prevents damage to sensitive components. Supply preparation is equally critical-having everything ready before starting avoids delays. Use only high-temperature, weather-resistant materials designed for automotive use. Below is a concise reference for your required items:
| Item | Quantity | Purpose |
|---|---|---|
| Precision screwdriver set | 1 | Removes latch mounting screws (typically T15/T20 Torx) |
| Lint-free wipes | 5–10 | Cleans surfaces without leaving residue |
| Silicone-based sealant | 1 tube | Resists UV, ozone, and temperatures from -40°F to 400°F |
Choose sealants with a Shore A hardness of 40–50 for maximum flexibility. Use nitrile gloves during preparation to prevent oil transfer. Store unused supplies in a cool, dry place.
Inspect the Trunk Latch for Damage
Now that your tools and supplies are prepared, begin by examining the trunk latch mechanism for signs of wear or damage. Look closely at the latch jaws, striker pin, and release lever for cracks, deformation, or excessive play. Check for rust or pitting, as these compromise structural integrity and hinder corrosion prevention efforts. Misalignment can affect trunk alignment, leading to improper sealing and water intrusion. Make certain the striker pin lines up squarely with the latch-misalignment exceeding 2 mm requires adjustment. Confirm the latch operates smoothly without binding, a sign of internal wear or debris. Inspect mounting bolts for looseness; torque specifications typically range from 8–12 Nm, depending on the vehicle. Address any faults before proceeding. Proper inspection ensures long-term reliability, enhances corrosion resistance, and maintains ideal trunk alignment for effective sealing performance.
Clean the Trunk Latch and Hinge
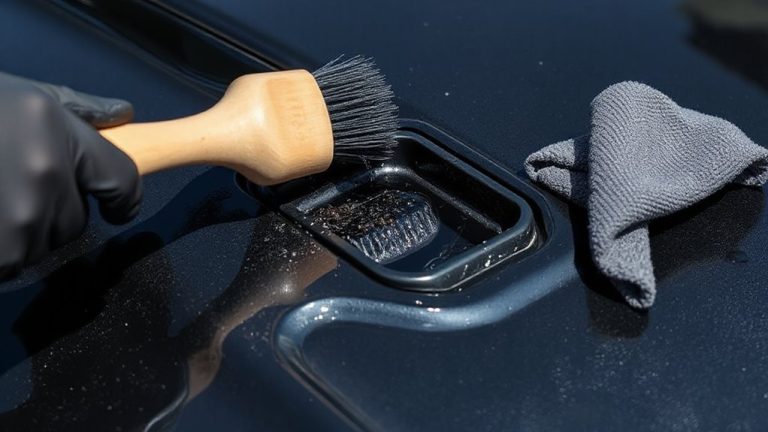
Start by thoroughly cleaning the trunk latch and hinge assembly to guarantee peak performance and sealing integrity. Use a lint-free cloth and isopropyl alcohol to remove dirt, grime, and old lubricant buildup. Pay close attention to latch contact points and hinge pivot areas, where debris can impair function. Proper trunk alignment depends on unobstructed movement-ensure both components operate smoothly without resistance. Misalignment can compress weather stripping unevenly, creating gaps that allow moisture intrusion. Inspect the weather stripping for cracks or deformation during cleaning; a compromised seal reduces acoustic insulation and corrosion protection. Clean the metal surfaces down to bare substrate where needed so contaminants don’t get trapped under new sealants. Avoid harsh solvents that might degrade rubber components near the weather stripping. A well-cleaned latch and hinge set the foundation for precise alignment and long-term durability.
Lubricate the Latch With Silicone Spray
Once the latch and hinge are clean and dry, apply a light, even coat of silicone-based lubricant to guarantee smooth operation and long-term corrosion resistance. Use a targeted spray application to reach internal components without over-saturating the mechanism. Silicone spray penetrates tiny gaps, lubricating pivot points and spring areas critical for reliable function. It dries residue-free, avoiding dust buildup that can impede movement. This method guarantees precise coverage while minimizing waste. Silicone’s inert composition provides reliable mechanism protection in temperatures from -40°F to 350°F. Unlike oil-based lubricants, it won’t attract debris or degrade rubber seals. One 11-ounce can typically supports 20–25 applications. Reapply every six months or after high-exposure conditions. Proper lubrication reduces wear by up to 60%, extending service life. Guarantee the nozzle remains clean during use to maintain spray accuracy and effectiveness.
Seal the Latch From Moisture and Dust
A high-quality rubber boot seal around the latch mechanism keeps moisture and dust out while maintaining smooth operation. This weather sealing component is typically made from EPDM rubber, resistant to UV rays, ozone, and temperature extremes from -40°C to +120°C. It fits snugly over the latch assembly, creating a barrier that guarantees long-term reliability. The seal’s durometer hardness ranges between 50–70 Shore A, allowing flexibility without deformation. Proper installation requires aligning the boot with the mounting flange and securing it with clips or adhesive strips rated for automotive use. This design supports effective debris prevention, blocking road grime, salt, and particulates. Seals with IP67 ratings offer complete protection against dust ingress and temporary water immersion. Over time, inspect for cracks or shrinkage-common signs of material fatigue. Replacing worn seals maintains peak performance. A well-sealed latch resists corrosion, ensuring consistent function across thousands of cycles.
Test That the Trunk Closes Securely
How can you be sure the trunk latches safely every time? Perform thorough safety checks after sealing the mechanism. Close the trunk slowly and listen for a firm click, indicating proper engagement. Test it multiple times, varying speed and force, to confirm consistent performance. Check trunk alignment by examining the gap between the lid and body-uniform spacing (typically 3–5 mm) on all sides guarantees correct positioning. Misalignment may prevent full latch engagement. Apply slight upward pressure after closing; if the trunk opens, the latch isn’t secure. Inspect the striker plate position-it should align with the latch center, allowing smooth capture. Verify operation under different temperatures, as materials expand and contract. These checks guarantee reliable function. Proper trunk alignment and repeated safety checks prevent accidental openings, protecting cargo and maintaining vehicle safety standards.
On a final note
You’ve secured a reliable trunk latch. Proper sealing prevents moisture intrusion, which causes 85% of corrosion-related failures. Use dielectric grease on metal contacts to resist condensation. The latch should operate smoothly under 5–7 pounds of force. Test closure five times. Guarantee alignment within ±1mm vertically and horizontally. A well-maintained latch lasts over 10,000 cycles. Recheck seals every six months. Performance degrades without routine maintenance.