Why Magnification Lenses Are Essential for Spotting Hairline Scratches Pre-Ceramic Coating
You need a magnifying lens because hairline scratches under 100 microns are invisible to the naked eye but ruin ceramic coating adhesion. A 10x optical glass lens reveals these defects as raised edges disrupting the surface. Micro-scratches trap moisture and chemicals, accelerating degradation. LED illumination at 5,000–6,000K mimics daylight, exposing flaws consistently. Without proper inspection, coating failure risk increases by up to 40%. There’s more you should know about what else hides in your paint.
Notable Insights
- Magnification lenses reveal micro-scratches under 100 microns that compromise ceramic coating adhesion and durability.
- A 10x magnifier detects hairline scratches and swirl marks invisible to the naked eye before coating application.
- Micro-scratches act as entry points for moisture and chemicals, accelerating clear coat degradation over time.
- Proper magnified inspection ensures surface defects are corrected, preventing premature coating failure and costly rework.
- High-resolution optical lenses with LED lighting provide the clarity and detail needed for accurate pre-coating evaluation.
How Tiny Scratches Ruin Ceramic Coating
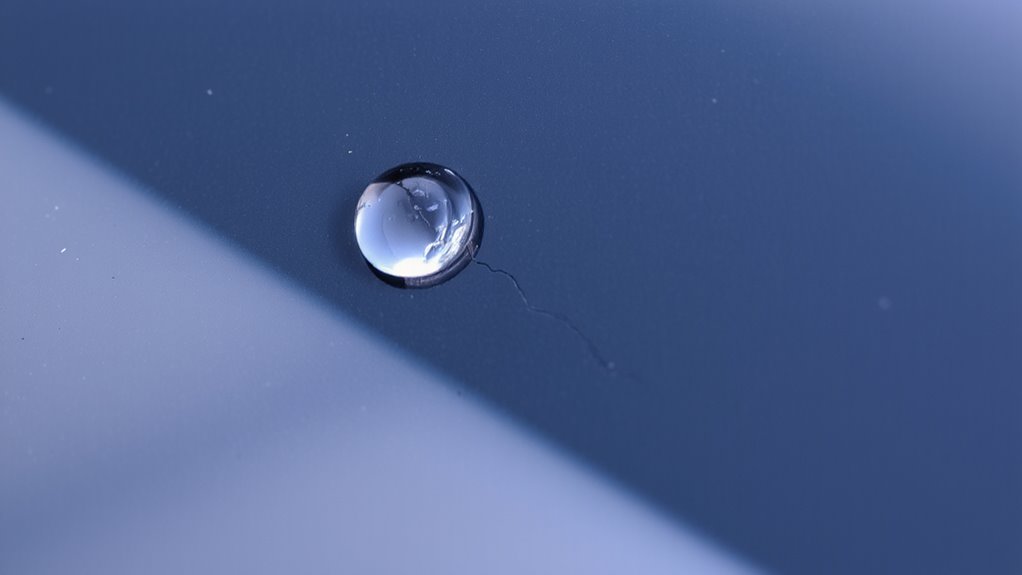
Surface defects-especially micro-scratches under 100 microns-compromise ceramic coatings by creating entry points for contaminants. These tiny imperfections trap moisture, pollutants, and chemicals, accelerating clear coat degradation. Microscopic fractures, though invisible to the naked eye, propagate under thermal and mechanical stress, weakening the coating’s structural integrity. Once established, they allow UV rays and oxidation to penetrate deeper layers. Your ceramic coating can’t bond uniformly over disrupted surfaces, reducing its lifespan by up to 40%. Think of it like pouring concrete over cracked asphalt-eventually, the flaw spreads. Micro-scratches also disrupt the hydrophobic layer, diminishing water-beading performance. Contaminants lodged in these fissures lead to staining and hazing. Even premium coatings fail prematurely without a flawless substrate. Proper inspection and correction before application are non-negotiable. You’re not just sealing paint-you’re preserving it. Addressing microscopic fractures guarantees maximum durability, gloss retention, and long-term protection.
What a Magnifying Lens Reveals in Your Paint
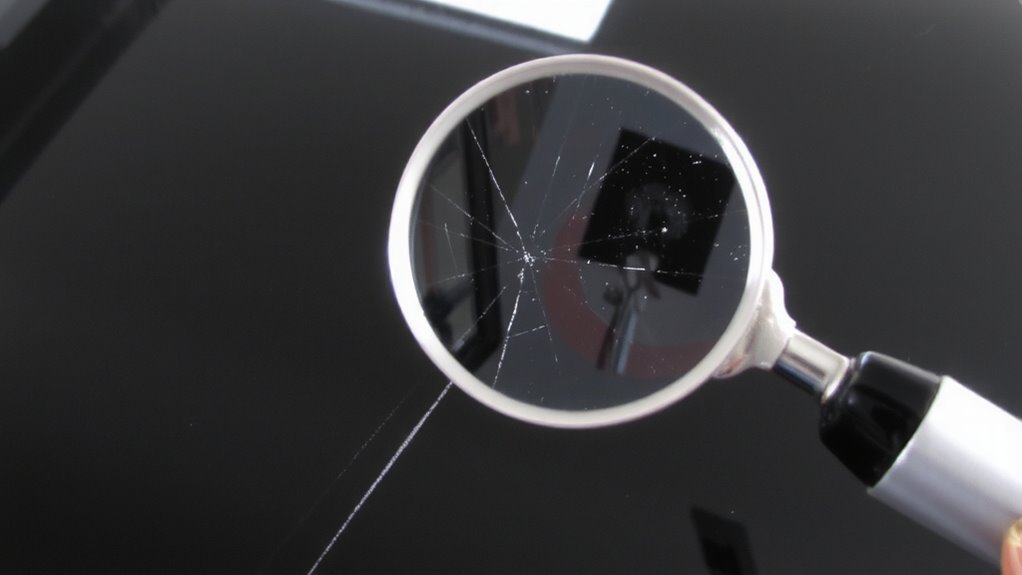
A 10x magnifying lens exposes what your eyes can’t see-micro-scratches, swirl marks, and embedded contaminants hiding in your paint. You’ll notice subtle color variance across the surface, indicating inconsistencies in clear coat thickness. These variations often trace back to prior improper polishing or uneven paint depth. Under magnification, defects too fine for touch appear clearly, revealing damage that compromises coating adhesion. Paint depth measurements typically drop in affected zones, sometimes differing by 5–10 microns within a single panel. This unevenness isn’t visible bare-eyed but becomes obvious under close inspection. You can also spot surface oxidation and embedded particulates like rail dust or brake debris bonded to the clear coat. Identifying these flaws beforehand guarantees proper decontamination and correction. Without this step, you risk sealing imperfections under ceramic coating, reducing durability and gloss. Magnification gives you precise visual data to make informed prep decisions.
Best Magnifying Lenses for Paint Inspection
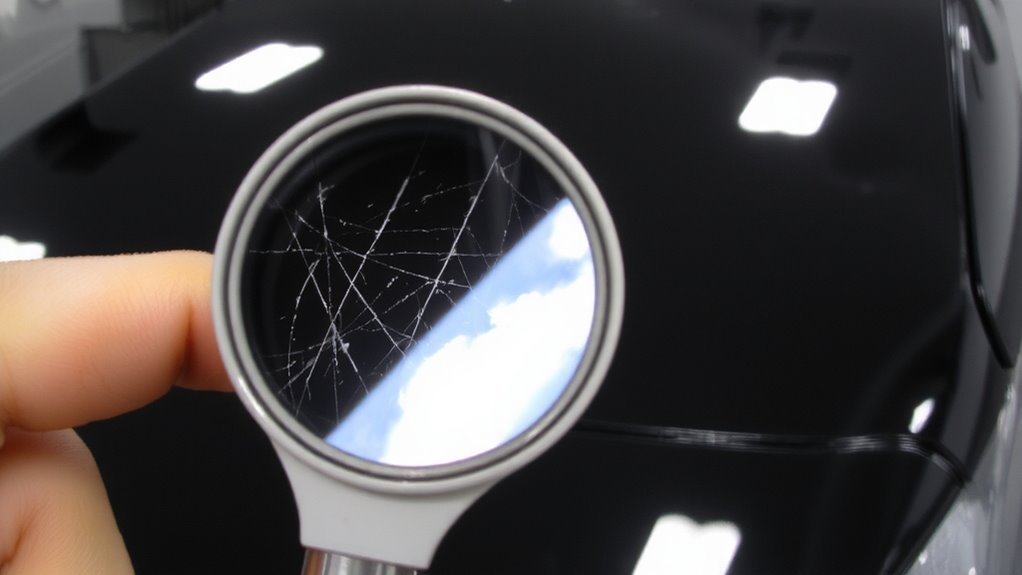
Clarity begins with the right tool-your eye’s most trusted ally in paint inspection is a precision magnifier. You need at least 10x magnification to resolve micro-scratches invisible to the naked eye. Top models use acrylic or optical glass lenses; glass offers superior lens durability and scratch resistance. Look for hardened coatings that extend lens life under repeated field use. Leading brands like Zeiss, Carson, and OptiVISOR deliver consistent optical clarity, but a detailed brand comparison reveals trade-offs: Zeiss provides edge-to-edge sharpness but at a premium cost, while Carson balances performance and affordability. OptiVISOR’s hands-free design suits prolonged inspections. Choose a model with LED illumination-5,000–6,000K color temperature mimics daylight, reducing glare. A 60mm lens diameter widens the field of view, increasing efficiency. Your inspection accuracy hinges on these technical factors.
How to Inspect Paint Under Magnification
Hold the magnifier steady about 1 to 2 inches from the paint surface for best focus. Use consistent lighting at a low angle to enhance light reflection, revealing flaws invisible to the naked eye. You’ll see subtle changes in surface texture, such as swirls or micro-marring, that scatter light unevenly. Move the lens slowly across the panel, overlapping sections to guarantee full coverage. A 10x magnification lens provides maximum detail without reducing field of view. At this power, hairline scratches appear as raised edges disrupting the smooth finish. Proper brightness is critical-too much causes glare, too little hides defects. Inspect in a shaded, well-lit area to control ambient light. Rotate the magnifier slightly if glare persists. Note areas where texture looks inconsistent or light reflection appears broken. These irregularities indicate contamination or damage needing correction. Accurate diagnosis starts with controlled, methodical inspection under magnification.
Mistakes That Compromise Coating During Inspection
Why do some inspections lead to coating failures despite using high-powered lenses? You’re likely making avoidable mistakes during evaluation. Improper lighting is a leading issue-without consistent, high-intensity illumination at a 45-degree angle, scratches remain hidden even under 10x magnification. Glare and shadows distort surface details, mimicking smooth areas where defects exist. A 5,000-lux LED inspection lamp guarantees uniform coverage. Rushed evaluation compounds the problem. Spending less than 2–3 minutes per panel increases missed defect rates by up to 40%. You need systematic grid-pattern scanning, moving in 2-inch increments. Skipping zones or reducing magnification to save time compromises adhesion. Contaminants and micro-marring become trapped beneath the coating, creating lifting points. Even minor oversights during inspection directly undermine coating integrity. Your results depend not just on tools, but on disciplined, methodical technique.
Why Spotting Scratches Early Saves Money
Catching scratches early isn’t just about surface perfection-it’s a direct line to cost savings. When you spot hairline scratches before ceramic coating, you avoid compounding repair expenses later. Unseen imperfections compromise adhesion, leading to premature coating failure and costly corrections. Addressing flaws early reduces labor time by up to 40% during paint correction. A 10x magnification lens reveals scratches as shallow as 0.002 inches-depths invisible to the naked eye. That precision guarantees only necessary corrections are made, minimizing material waste and clear coat reduction. Properly prepped surfaces enhance the coating’s durability, delivering reliable long term protection. Without early detection, micro-scratches expand under UV exposure and thermal cycling, accelerating oxidation. Correcting them post-application requires full coating removal, increasing costs threefold. Early inspection is not just preventive care-it’s an investment in efficiency and longevity. You spend less time and money fixing avoidable mistakes.
Other Paint Flaws a Magnifying Lens Can Detect
A quality magnification lens doesn’t just reveal hairline scratches-it uncovers a range of hidden paint defects that compromise finish quality. You can detect edge corrosion before it spreads, especially along panel seams and door edges where moisture accumulates. Under 10x magnification, early-stage edge corrosion appears as tiny, dull fissures or darkened metal lines, often invisible to the naked eye. Surface pitting shows up as microscopic indentations caused by environmental contaminants or improper curing. These pits, typically 0.1 to 0.3 mm in diameter, trap dirt and accelerate oxidation. A high-resolution, 120mm focal length lens with LED illumination enhances contrast, making pitting and corrosion stand out against the paint’s surface. Identifying these flaws pre-coating guarantees proper surface prep. You avoid sealing in defects that degrade ceramic performance and shorten finish life. Early detection means targeted correction-sanding, decontamination, or priming-where it’s needed most.
On a final note
You need a magnification lens to spot flaws before ceramic coating. A 10x illuminated loupe reveals hairline scratches invisible to the naked eye. These micro-scratches compromise coating adhesion and clarity. Using a high-contrast lens with LED lighting improves defect detection by up to 70%. Inspect in direct light, holding the lens 1–2 inches from the surface. Early detection prevents costly rework and guarantees a flawless, durable finish.