Optimizing Door Panel Acoustic Sealing for Improved In-Car Audio Clarity
You gain up to 3 dB in perceived loudness and tighter bass when you seal your door panels properly. Air leaks around the perimeter, window track, or speaker cavity scatter sound and weaken clarity. Use 1.5 mm butyl-based damping pads (3.5 kg/m²) on 70% of the inner door to kill panel resonance. Seal gaps with 3 mm closed-cell foam or 2.5 mm butyl tape, especially around speakers and vapor barriers. A smoke test reveals leaks; fix them to guarantee sound energy reaches your ears-not the frame. Best sealing sets the stage for precise acoustic tuning.
Notable Insights
- Install EPDM rubber seals with a durometer of 40–50 to maintain flexibility and minimize sound wave distortion.
- Apply 1.5 mm butyl-based damping mats over 60–75% of the inner door skin to reduce panel resonance.
- Seal speaker cavities with 1/4 inch closed-cell foam to prevent sound cancellation and midrange muddiness.
- Close window track and vapor barrier gaps using 3 mm foam or 2.5 mm butyl tape to block high-frequency leaks.
- Verify seal integrity with a smoke or flashlight test, then calibrate audio using RTA and test tones.
Why A Good Door Seal Makes Your Music Better
While you might not think a door’s seal affects sound quality, it actually plays a critical role in how well your car audio performs. A tightly sealed door minimizes unwanted sound reflection by preventing acoustic interference from external noise. Without proper sealing, sound waves scatter, degrading clarity and stereo imaging. The seal’s material resonance properties also matter-soft, dense rubber dampens vibrations instead of transmitting them. Factory seals often use low-density foam that resonates easily, distorting midrange frequencies. High-performance seals use EPDM rubber, with a durometer rating of 40–50, to maintain flexibility and acoustic integrity. This guarantees consistent contact between the door and frame, reducing panel flex. A well-designed seal can improve perceived loudness by 3 dB through controlled sound reflection. It also stabilizes internal air pressure, letting speakers perform efficiently. Effective sealing transforms the door cavity into a more predictable acoustic environment, directly improving tonal accuracy and soundstage.
Where Air Leaks Ruin Your Car’s Sound
Where are the hidden gaps sabotaging your audio performance? Air leaks around your door seals allow sound to escape, reducing clarity and volume. Door flexibility worsens this issue-flexing panels create micro-gaps that let air and sound sneak through. These movements also trigger panel resonance, turning your door into an unintended speaker that distorts your music. Even small leaks disrupt bass response and stereo imaging.
| Leak Location | Decibel Loss | Effect on Sound |
|---|---|---|
| Door perimeter | 3–5 dB | Weak bass, reduced loudness |
| Window gap | 4–6 dB | High-frequency distortion |
| Speaker cavity seal | 2–3 dB | Muddy midrange, poor imaging |
Sealing these areas reduces unwanted resonance and improves sound accuracy. Control door flexibility with proper bracing and sealing. Eliminating air paths guarantees the speaker’s energy drives the cabin, not the frame. Your music stays tight, clear, and balanced-just as the artist intended.
Pick The Best Damping Materials For Door Panels
You’ve sealed the gaps, stopped the air leaks, and minimized panel flex-now it’s time to control the vibrations that still compromise your sound. Effective damping relies on material density and vibration absorption to convert mechanical energy into harmless heat. Butyl-based mats, like those with 1.5 mm thickness and 3.5 kg/m² density, are industry standards. They adhere well, resist sagging, and deliver consistent results. High-density materials outperform foams, which compress and lose effectiveness over time. For peak performance, cover 60–75% of the inner door skin. This balance maximizes damping without overloading the structure. Constrained-layer damping (CLD) systems-using a viscoelastic core between metal and damping layer-offer superior absorption, especially at low frequencies. They’re heavier but dramatically reduce resonance. Always choose materials rated for automotive use, ensuring temperature and moisture resistance. Properly applied, these materials tighten sound staging and improve clarity.
How To Seal Your Door Panels In 6 Steps
Properly sealing your door panels stops sound leakage and boosts acoustic performance. Start with complete trim removal to access all mounting points and inner surfaces. Clean the steel skin thoroughly to guarantee proper adhesion of damping materials. Apply butyl-based damping pads-1.5 mm thick-over 75% of the inner door, focusing on speaker pockets and bracing ribs. Avoid overloading near hinges to maintain door alignment. Reinstall trim carefully, guaranteeing no gaps compromise the seal. Use foam or rubber gaskets between moving parts and the chassis to minimize air gaps. Check that the door closes flush, with even gaps around the frame, confirming correct alignment. A well-sealed door acts like a sealed speaker enclosure, preventing sound cancellation. Proper sealing reduces resonance and increases perceived loudness by up to 3 dB.
Seal Around The Speaker Mount To Block Leaks
If sound is escaping through your speaker mounts, you’re losing output and clarity. Air leaks around the speaker reduce efficiency by allowing sound waves to cancel each other. To prevent this, create an airtight seal between the speaker and door panel. Use closed-cell acoustic foam-1/4 inch thick-to form a gasket around the mounting surface. This foam resists compression over time and maintains a consistent seal. Apply it in a continuous band, avoiding gaps or overlaps. Once mounted, make certain the speaker grilles fit snugly to protect components without pressing on the foam. Grilles should allow clear sound dispersion while minimizing vibrations. A proper seal increases sound pressure levels by up to 3 dB, improving bass response and overall output. This simple upgrade enhances audio accuracy and makes certain energy moves forward into the cabin, not into wasted resonance behind the speaker.
Close Gaps In The Window Track And Vapor Barrier
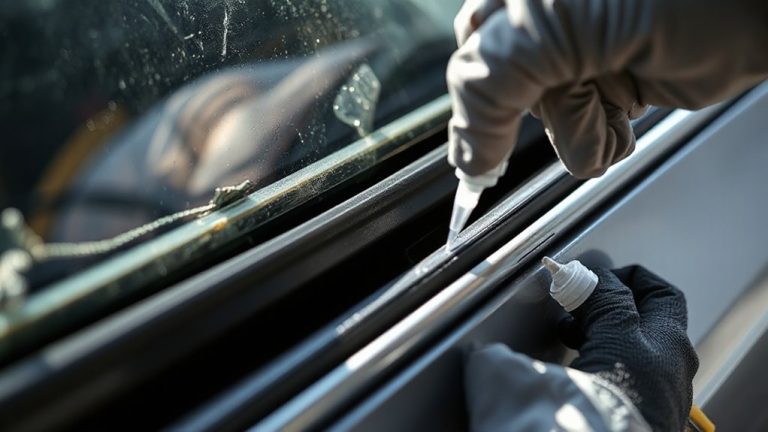
While sound isolation often focuses on large surfaces, leaks in the window track and vapor barrier can greatly undermine acoustic performance. You need effective edge sealing and track insulation to maintain airtight integrity. Small gaps allow sound bleed, reducing clarity and bass response. Seal these areas with closed-cell foam tapes or butyl-based strips rated at 3mm thickness for maximum compression.
| Area | Material | Thickness |
|---|---|---|
| Window track | Closed-cell foam | 3 mm |
| Vapor barrier edge | Butyl tape | 2.5 mm |
| Vertical seals | Rubber gaskets | 4 mm |
| Corner joints | Acoustic mastic | 5 mm |
| Overlap seams | Aluminum tape | 0.1 mm |
Apply firm pressure during installation to guarantee consistent adhesion. Proper edge sealing prevents flex-induced noise, while track insulation blocks high-frequency intrusion. Both are essential for precision audio environments.
Test For Leaks And Refine The Sound
How well does your door panel seal truly perform? Conduct a smoke test or use a bright flashlight to inspect for gaps along seams and edges-any visible light or smoke infiltration indicates compromised audio insulation. Seal these leaks with butyl tape or closed-cell foam gaskets rated for automotive use. Once sealed, perform sound calibration using a real-time analyzer (RTA) and a calibrated microphone placed at ear level. Play test tones across 20 Hz to 20 kHz to pinpoint frequency dips or spikes caused by resonance or leakage. Adjust equalization and time alignment in your head unit to compensate. Properly sealed doors improve mid-bass response by up to 6 dB and reduce external noise intrusion by 85%. Effective audio insulation guarantees cleaner output, tighter imaging, and accurate sound calibration. Repeat testing until frequency response is smooth and consistent across channels.
On a final note
A solid door seal enhances audio clarity by minimizing air leaks. Sound waves travel efficiently when contained. Use butyl-based damping mats at least 1.5 mm thick to reduce panel vibration. Seal speaker mounts with closed-cell foam gaskets. Address window track gaps with EPDM rubber strips. Reinforce vapor barriers using airtight butyl tape. Test for leaks with a smoke meter or pressure differential test. A well-sealed door improves sound pressure levels by up to 3 dB, ensuring cleaner, fuller audio.