Rear Main Seal Leak Identification and Temporary Containment Measures
You’ve got a rear main seal leak if you see dark oil collecting where the engine meets the transmission, often dripping from the bell housing. This rubber seal wears over time due to crankshaft friction, heat, and oil pressure above 20–60 psi. Start by cleaning the area and checking for seepage after a short drive. For a temporary fix, apply high-temp silicone or reinforced epoxy to the housing seam, extending 1 inch beyond the leak. Cure for two hours at room temperature-or one with a heat gun-and limit driving to under 50 miles per day. Monitor oil levels every two days, as untreated leaks can lead to quartly losses every 1,000 miles. While stop-leak additives may swell minor seepage in natural rubber seals, they don’t work on cracked or fluorocarbon seals and risk clogging filters. There’s more to contemplate when weighing long-term solutions.
Notable Insights
- A dark oil spot near the transmission bell housing suggests a rear main seal leak at the engine-transmission junction.
- Wipe the area clean and check for reappearing oil after a short drive to confirm the leak source.
- Oil pan gasket or upper engine leaks can mimic rear main seal leaks; trace oil flow upward to find the real origin.
- Clean and dry the leaking area, then apply high-temp silicone or epoxy as a temporary patch with firm pressure.
- Stop-leak additives may help minor seepage by swelling the seal, but won’t fix cracked or severely worn seals.
5 Signs You Have a Rear Main Seal Leak
Ever noticed a dark, oily spot under your car after it’s been parked? That’s often the first clue of a rear main seal leak. Oil stains typically appear near the transmission bell housing, where the engine meets the transmission. The rubber seal around the crankshaft wears over time, allowing engine oil to escape. You might also detect subtle engine noise, like a light tapping or knocking, caused by low oil levels from chronic leakage. This seal usually lasts 80,000 to 100,000 miles, but heat cycles and poor oil quality accelerate failure. Leaks start small-less than a drop per hour-but can progress to a quart lost every 1,000 miles. Ignoring it risks engine damage. Confirm by wiping the area and rechecking after a short drive. Persistent seepage means the seal is compromised.
Is It Really the Rear Main? Check These Other Leaks?
Could that puddle under your car actually be coming from somewhere other than the rear main seal? Many oil leaks mimic rear main issues but originate elsewhere. A leaking oil pan gasket often drips from the bottom center of the engine, producing a similar ground stain. Inspect the seam between the oil pan and engine block-any seepage here confirms the gasket is failing. Conversely, a valve cover leak typically leaves oil residue along the top edges of the engine, especially near the spark plug holes. Over time, oil runs down the block, creating a false impression of a rear leak. Use a flashlight to trace the highest point of oil accumulation-this reveals the true source. Always verify the leak location before disassembling components. Misdiagnosis wastes time and money.
What a Rear Main Seal Does (And Why It Fails)
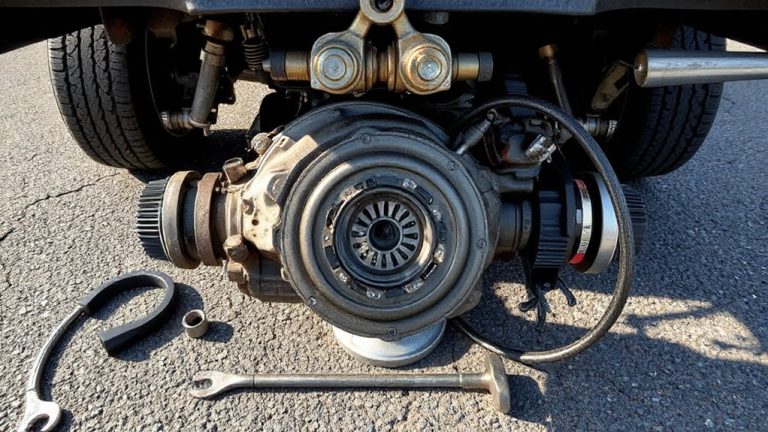
The rear main seal sits deep within the engine’s anatomy, guarding one of the most critical junctions between the crankshaft and the transmission. It prevents oil leakage where the crankshaft extends into the transmission housing. Constant crankshaft rotation wears the seal over time, especially if oil pressure exceeds normal range (typically 20–60 psi). High oil pressure forces more fluid against the seal, accelerating deterioration. Heat and contaminants in the oil further degrade rubber components.
| Factor | Effect on Seal | Prevention |
|---|---|---|
| Crankshaft rotation | Causes friction wear | Regular engine maintenance |
| High oil pressure | Forces oil past seal | Monitor oil system |
| Age/hardening | Reduces seal flexibility | Replace every 100k miles |
Seal failure often begins subtly but worsens quickly. You’ll notice oil pooling behind the engine near the transmission bellhousing.
How to Slow a Rear Main Seal Leak Immediately
A temporary fix can buy you time before a full repair. Use an Emergency patch made of high-temp silicone or reinforced epoxy to seal minor housing gaps near the seal area. Clean and dry the surface thoroughly-oil residue must be removed for adhesion. Apply the patch material with firm pressure, ensuring it bridges the leak zone by at least 1 inch beyond the visible seepage. Allow it to cure for two hours at room temperature, or one hour with a heat gun accelerating cross-linking. Friction heat from engine operation will test the patch’s integrity; materials rated above 400°F are ideal. Limit driving to under 50 miles per day to reduce thermal cycling. Monitor oil levels every two days. This method slows seepage but won’t withstand prolonged high RPM use. It’s a field-expedient solution, not a permanent fix.
Stop-Leak Products That Work: And When They Don’t
You’ve probably tried a physical patch to slow the leak, but stop-leak additives offer another path when external fixes aren’t enough. These products work by softening and swelling the rear main seal, temporarily reducing seepage. Product efficacy depends on seal material and fluid type. Most stop-leaks contain polymers or synthetic esters that condition rubber, but won’t fix cracks or severe wear. For older vehicles with natural rubber seals, results are often better than on modern cars using fluorocarbon-based materials. Chemical compatibility with your engine oil is critical-some additives thicken oil or clog filters, risking oil flow issues. Always verify viscosity changes; premium formulas maintain SAE standards within ±5%. Success rates drop in engines over 100,000 miles. Use them only as a short-term solution when immediate repair isn’t possible. Top-rated engine oil stop leak products deliver consistent results when matched to your vehicle’s age and seal type.
Repair or Replace? Your Long-Term Options
How long can you really depend on a temporary fix? Not long. For long term durability, replacing the rear main seal is essential. A proper repair guarantees the engine’s rear crankshaft seal prevents oil leaks under sustained heat and pressure. Temporary solutions like stop-leak additives may seal minor seepage but fail under high RPM or prolonged operation. They aren’t a substitute for mechanical repair. A complete seal replacement requires transmission or engine removal, depending on vehicle design. Labor typically takes 6–10 hours, with OEM seals costing $20–$50. Aftermarket versions offer similar performance. Do a cost comparison: ignoring the issue risks engine damage from low oil, leading to expensive repairs. Replacing the seal now protects internal components. It’s a precise job-misalignment by even 0.5 mm causes failure. Only trained technicians should attempt it. Long term, replacement beats repeated fixes.
On a final note
You now know the signs of a failing rear main seal. Dark oil spots under your car signal trouble. The seal sits between engine and transmission, handling high pressure. Once it fails, leaks persist. Stop-leak additives may help short-term but aren’t permanent. A 0.03-inch seal clearance tolerance means precision matters. Repair costs range from $600–$1,500. Replacement is the only lasting fix.