Transmission Cooler Line Inspection for Corrosion or Vibration Fatigue
You should inspect your transmission cooler lines every 12,000 miles for corrosion and vibration fatigue. These steel or aluminum lines carry fluid at up to 150 psi and 250°F. Look for rust, especially near frame contact points, and check for cracks at bends or fittings. Wall thickness below 0.035 inches means replacement is required. Secure lines every 18 inches with non-metallic clips to prevent fatigue. A leak can cause transmission failure quickly-knowing what to look for keeps your system safe. There’s more to learn about each inspection step.
Notable Insights
- Inspect cooler lines every 12,000 miles for rust, especially in humid or salty environments.
- Check for cracks near bends and fittings where vibration fatigue commonly occurs.
- Look for fluid stains or oily residue along lines, fittings, and mounting points.
- Measure wall thickness; replace if below 0.035 inches due to corrosion or wear.
- Ensure secure mounting with non-metallic clips every 18 inches to minimize vibration damage.
What Transmission Cooler Lines Do (And Why They Fail)
While your transmission relies on consistent fluid temperature to operate efficiently, the cooler lines play a critical role in maintaining that balance. These steel or aluminum tubes carry transmission fluid between the transmission and the radiator or auxiliary cooler. Proper line routing guarantees minimal bends and secure mounting, reducing stress and heat exposure. Transmission fluid absorbs heat from internal components during operation; the cooler lines transport this heated fluid away to dissipate thermal energy. If lines fail, fluid flow becomes restricted or stops, leading to overheating and potential transmission damage. Most factory lines handle pressures up to 150 psi and temperatures near 250°F. Corrosion resistance depends on material thickness-typically 0.035 to 0.045 inches-and protective coatings. Line routing must avoid proximity to exhaust components, which can exceed 500°F, compromising fluid integrity and line durability over time.
Common Causes of Damage: Rust and Vibration
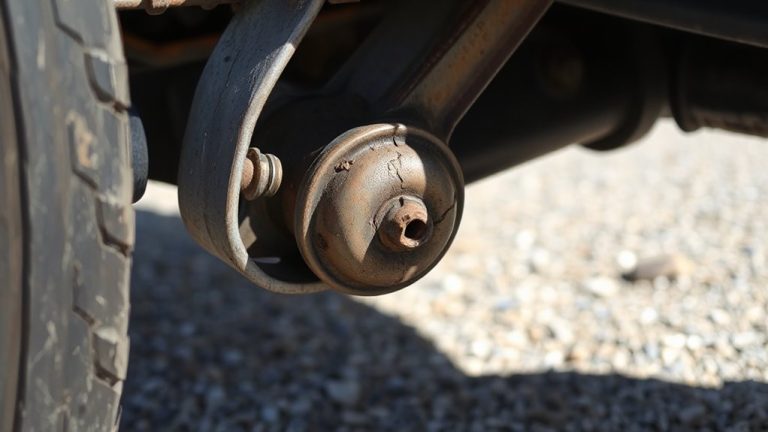
Even small environmental and mechanical stresses can degrade transmission cooler lines over time, with rust and vibration topping the list of common failure points. Rust forms when moisture interacts with steel lines, especially in humid or salty environments. Vibration fatigue occurs from constant engine movement, leading to cracks or leaks. Both issues compromise system integrity and invite fluid contamination. Mechanical abrasion from contact with other components accelerates wear.
| Cause | Effect | Common Location |
|---|---|---|
| Rust | Wall thinning, pinhole leaks | Frame contact points, undercarriage |
| Vibration | Cracks at fittings, joint failure | Mounting brackets, bends |
| Mechanical abrasion | Rubbed-through lines, fluid contamination | Near clamps, sharp edges |
Address these early to prevent transmission damage.
How to Spot Leaks, Cracks, and Weak Spots
A single drip under your vehicle could signal trouble in the transmission cooler lines-don’t ignore it. Fluid seepage often starts small but indicates a growing issue. Inspect metal lines along the radiator and firewall for wetness or oily residue, especially near fittings. Cracks typically form in high-vibration zones, such as near the engine block or suspension mounts, where metal fatigue occurs. Use a bright LED flashlight to examine bends and clamps-these areas are prone to joint erosion. Soft spots or bulges in rubber hoses suggest internal degradation. Look for red or brown stains, a sign of oxidized transmission fluid. Metal lines operate under 40–60 psi; even minor damage compromises integrity. Check for pitting or thinning walls using calipers-wall thickness below 0.035 inches requires attention. Early detection prevents total failure and costly repairs.
When to Repair Vs. Replace a Cooler Line
Don’t try to patch a transmission cooler line if the damage extends beyond a minor surface scratch-repairing a line with cracks, corrosion, or wall thinning below 0.035 inches risks failure under operating pressure. Material fatigue and line kinking compromise structural integrity, making replacement the safer choice. Minor dents or surface scrapes may allow repair, but only if the inner wall remains intact. When in doubt, replace the line to maintain peak transmission performance.
| Condition | Repair? | Replace? |
|---|---|---|
| Surface scratch | Yes | No |
| Wall thickness < 0.035" | No | Yes |
| Visible crack | No | Yes |
| Severe kinking | No | Yes |
| Material fatigue | No | Yes |
Section replacement won’t fix ongoing fatigue issues. Use this table to make fast, accurate decisions. Proper materials guarantee longevity under system pressure.
How to Prevent Future Cooler Line Problems
Regularly inspecting your transmission cooler lines every 12,000 miles helps catch issues before they lead to failure. Proper material selection is critical-use double-walled steel or aluminum lines rated for at least 500 psi to resist corrosion and pressure fatigue. Avoid copper or soft plastic lines; they degrade faster under high heat and vibration. Correct installation techniques prevent premature wear. Secure lines with non-metallic clips every 18 inches to minimize vibration. Maintain a 1/4-inch clearance from sharp edges or moving parts. Use OEM-spec flare nuts and torque fittings to 14–18 ft-lbs. Misaligned lines cause stress fractures. Guarantee bends have a minimum radius of 1 inch to avoid kinking. Proper routing avoids contact with exhaust components, which can exceed 400°F. These steps extend line life and maintain peak transmission fluid temperature, keeping your system reliable.
Quick Inspection Guide: Check Lines in 5 Minutes
While time is limited, a thorough check of your transmission cooler lines can still be completed in under five minutes with the right approach. Start by inspecting for visible leaks-compromised fluid integrity often shows as wet spots or dark stains along steel or aluminum lines. Examine each segment from radiator to transmission, especially near bends and joints where vibration fatigue accumulates. Check connection security at both the transmission case and radiator ports; loose fittings cause pressure loss and eventual failure. Use a torque wrench if resecuring-most OEM specs require 18–22 ft-lbs. Confirm lines are properly clamped to the chassis, spaced at least 1/4 inch from moving parts. Look for pitting or swelling, signs of internal corrosion or contamination. Replace rubber hoses every five years, even if they appear intact. A quick inspection maintains system efficiency and prevents catastrophic transmission damage.
On a final note
You must inspect transmission cooler lines regularly to prevent failure. These lines carry hot fluid under pressure, typically 50–80 psi, through the radiator. Corrosion thins metal walls, especially near brackets or seams. Vibration fatigue causes cracks at bend points or fittings. A compromised line leaks fluid, reducing cooling efficiency and risking overheating. Replace corroded or cracked lines immediately with OEM-spec steel or approved aluminum. Use proper clamps and secure routing.