Bench-Bleeding a New Brake Caliper Before Installation to Prevent Air Locks
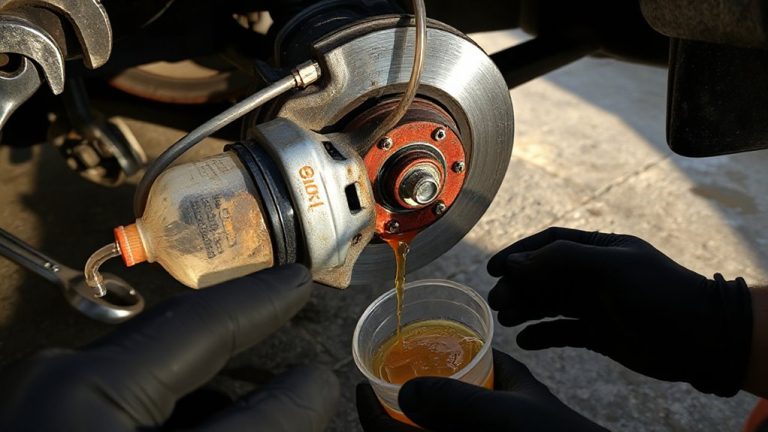
You must bench-bleed a new brake caliper before installation to prevent dangerous air locks in the hydraulic system. Trapped air reduces braking efficiency by over 20% under test, causing a spongy pedal and longer stopping distances. Use a C-clamp, clear vinyl tubing, and fresh DOT-compliant fluid. Position the bleeder screw at the highest point (10–2 o’clock), open it ½ turn, compress the piston slowly, then close before release. Repeat until fluid flows bubble-free-typically 30–50 strokes. Guarantee seals are tight and torque the bleed screw to 7–10 ft-lbs. A smooth, foamy-free stream means the caliper is fully bled. If bubbles persist, check for leaks or a compromised inlet seal rated for 100 psi. After successful bleeding, you’ll be ready to install with confidence in the system’s integrity.
Notable Insights
- Bench-bleeding removes trapped air from new calipers to prevent spongy brake pedals and ensure efficient piston movement.
- Position the caliper with the bleeder valve at the highest point to allow air to escape effectively.
- Use clear tubing connected to the bleeder valve, submerged in brake fluid, to capture air and prevent re-entry.
- Slowly compress the piston with a C-clamp, open the valve slightly, and close it before releasing pressure.
- Repeat pumping until fluid flows bubble-free, then perform 5–7 additional strokes to confirm complete air removal.
Why You Must Bench-Bleed to Avoid Brake Failure
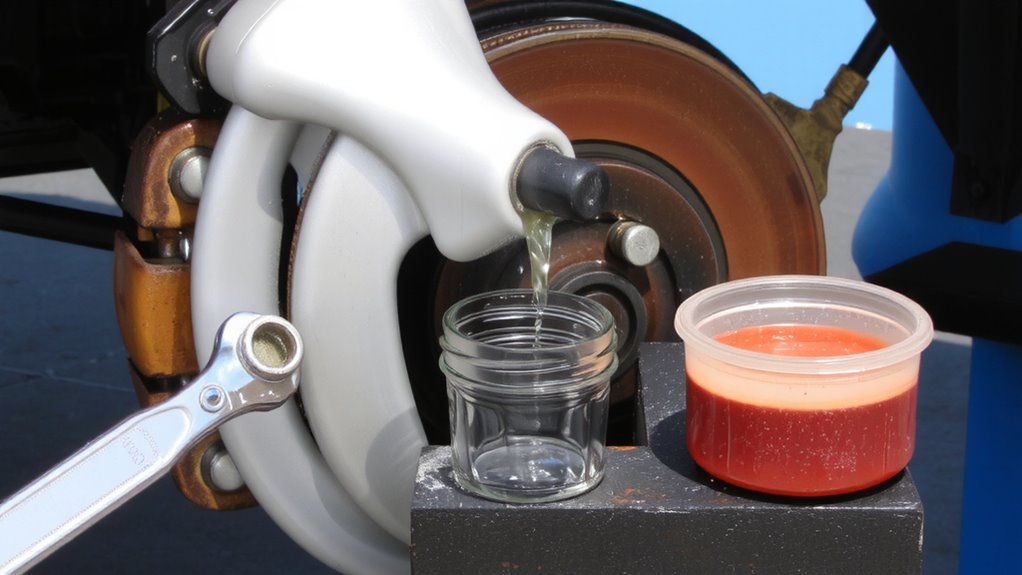
Even though the caliper is just one component in the braking system, failing to bench-bleed it before installation can lead to serious brake failure. You need brake safety, and trapped air compromises it. Air resistance inside the caliper prevents proper piston movement, reducing brake efficiency. Compressed air doesn’t transmit force like brake fluid, leading to a soft or spongy pedal. Bench-bleeding removes this air before installation, ensuring full hydraulic contact. Without it, you risk longer stopping distances-sometimes by over 20% under test conditions. Bench-bleeding takes less than 10 minutes but prevents system-wide contamination. It’s a critical prep step, not an optional shortcut. You’re working with a closed hydraulic circuit-any air introduced at the caliper disrupts pressure balance. Eliminate that risk upfront. Brake safety starts with clean, air-free components. You can’t afford to ignore air resistance in a system where milliseconds count. A well-maintained vehicle interior, including durable 2005 Ford F150 seat covers, can increase focus and comfort during long drives, contributing to overall driving safety.
What Tools You Need to Bench-Bleed a Caliper
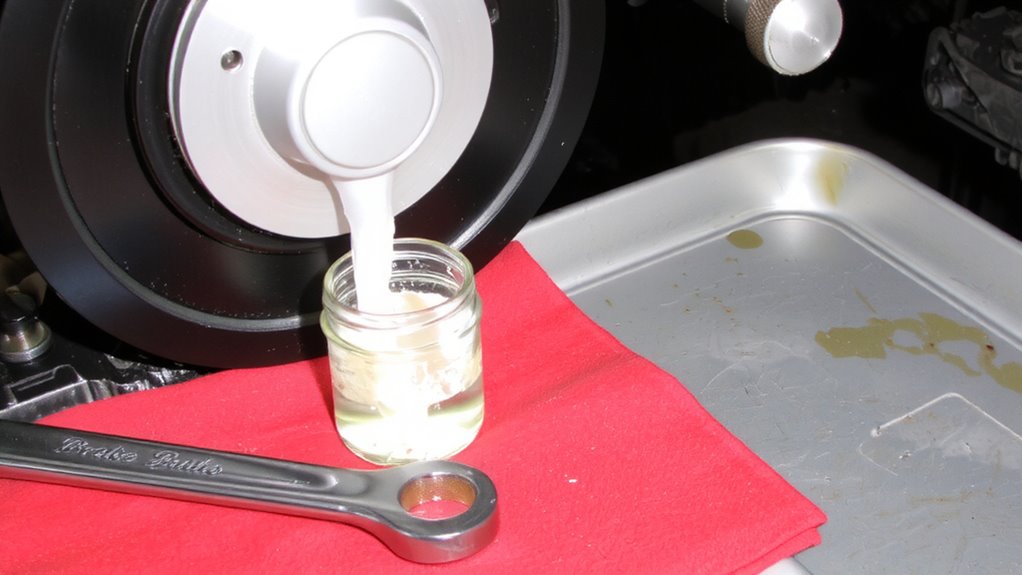
You’ve seen how trapped air compromises brake performance, so now it’s time to gather what you need to remove it properly. Effective fluid containment and thorough caliper inspection are critical before bench-bleeding. Use clean shop towels and a drip tray to catch spills and maintain a safe workspace. Inspect the caliper bore and seals for defects or contamination-any flaw risks leaks or failure. A reliable brake bleeding kit can make the process faster and more effective by minimizing air reintroduction. Below are the essential tools:
| Tool | Purpose |
|---|---|
| Clear plastic tubing (3/16″ ID) | Routes fluid from bleeder valve to reservoir |
| Vacuum bleeder vice kit | Draws air out efficiently without reintroduction |
| Brake bleeding kit with adapter | Seals to bleeder and prevents fluid splash |
| Brake fluid reservoir cap | Pressurizes system slightly during bleeding |
| C-clamp or caliper compressor | Holds piston in place for inspection |
Choose compatible fluids and verify tool fit before starting.
How to Bench-Bleed a Brake Caliper (Step-by-Step)
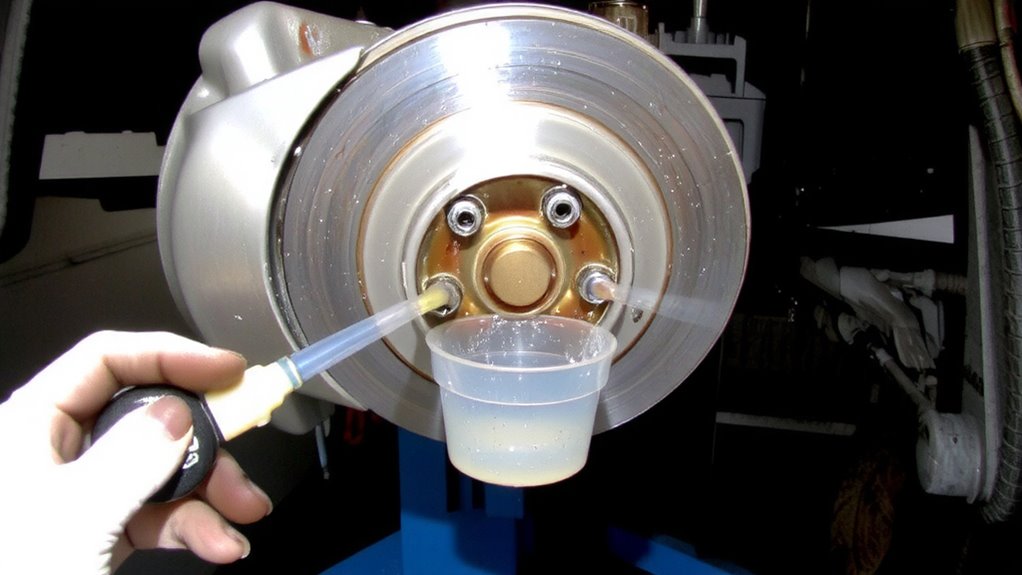
While the caliper remains off the vehicle, bench-bleeding removes air trapped in the bore and hydraulic passages before installation. Position the caliper with the bleed screw at the highest point to allow air bubbles to rise-correct caliper orientation is critical for effective bleeding. Attach a clear vinyl tube to the bleed valve and submerge the other end in a brake fluid container. Open the valve a half-turn, then compress the caliper piston slowly using a C-clamp or suitable tool. Close the valve before releasing pressure to prevent air re-entry. Repeat this cycle until no bubbles appear in the fluid. Follow the manufacturer’s recommended bleed sequence if multiple calipers are involved. Use only fresh, DOT-compliant brake fluid. This process guarantees maximum hydraulic efficiency and prevents post-installation complications due to trapped air.
Common Mistakes to Avoid When Bench-Bleeding
Why do some brake calipers still contain air after bench-bleeding? Improper sealing is a leading cause. If the bleed screw isn’t tightly closed or the bleeder tool doesn’t fit snugly, air re-enters during compression. Always confirm the rubber boot and fittings are intact and fully seated-use 7–10 ft-lbs of torque on the bleed valve. Uneven pressure compounds the issue. Pumping the piston too fast traps air bubbles; apply slow, steady force over 1–2 seconds per stroke. Let the piston retract fully before the next cycle-typically 30–50 strokes per caliper. Use fresh DOT 3 or DOT 4 fluid; contaminated fluid retains microbubbles. Align the bleeder port upward (at 10–2 o’clock position) to let air escape efficiently. Skipping these steps compromises hydraulic integrity, leading to spongy pedal feel or brake fade.
How to Know When the Caliper Is Fully Bench-Bled
A properly bench-bled caliper shows clear visual and mechanical signs that all air has been expelled from the system. You’ll know it’s done when fluid flows smoothly and consistently from the bleeder hole. Visual inspection is key-watch for bubbles. Once they stop, continue pumping the piston five to seven times to guarantee stability. Fluid consistency should be uniform, with no foam or cloudiness, indicating complete air removal.
| Stage | Bubbles Present? | Fluid Flow |
|---|---|---|
| Initial | Yes, frequent | Erratic |
| Mid-process | Occasional | Improving |
| Near-complete | Rare | Steady |
| Fully bled | None | Smooth, bubble-free |
Consistent pressure and clear output confirm readiness. A fully pre-bled caliper reduces installation time and prevents initial sponginess in the brake pedal. Trust the process and rely on these observable indicators.
How to Fix Persistent Air in a Bench-Bleed
Still seeing bubbles after repeated strokes? Persistent air likely means a compromised vacuum seal or improper fluid displacement. First, inspect the bench-bleed setup: guarantee the inlet port is fully sealed with a rubber cap or plug rated for at least 100 psi to maintain a proper vacuum seal. Any gap lets air infiltrate, mimicking internal trapped pockets. Reattach hoses tightly and verify the bleed screw is snug-typically torqued to 7–10 ft-lbs. Next, perform a pressure test: pressurize the system to 15 psi using a handheld vacuum pump and monitor for drops over 60 seconds. A decline indicates leakage. Submerge hydraulic lines if needed; bubbles reveal weak joints. Re-pressurize and re-bleed in slow, full strokes-rushing causes vortex aeration. Repeat pressure test until stable. Only when pressure holds and fluid flows bubble-free is the caliper ready.
How to Install the Caliper After Bleeding
Once the caliper is fully bench-bleeded and free of air, you’re ready to install it on the vehicle. Begin by reattaching the caliper to the brake mount using the factory-specified torque of 22–26 ft-lbs for most passenger vehicles. Proper caliper alignment guarantees even pad wear and prevents rotor drag. Misalignment can cause vibration or uneven braking. Route the brake line carefully, avoiding sharp bends or kinks-this is critical for maintaining pressure and preventing leaks. Follow OEM brake line routing paths; deviations greater than 15 degrees from stock angles may restrict fluid flow. Use nylon zip ties to secure the line every 12 inches along its run. Double-check that the bleeder valve is in the highest position to prevent residual air pockets. Reconnect the hose and inspect for leaks before reinstalling the wheel. Final system pressure testing should reach 900–1,100 psi during operation.
On a final note
You must bench-bleed a new caliper to remove trapped air before installation. Air pockets reduce hydraulic pressure, causing spongy brakes or total failure. Use a bleeder kit with a clear tube and DOT-compliant fluid. Fill the caliper bore completely-no bubbles means full prime. Once clear fluid flows steadily, the caliper is ready. Improper bleeding leads to longer pedal travel and reduced stopping power.