How to Remove Tar From Rear Diffusers Without Damaging Coating Edges
Apply a citrus-based tar remover like Adam’s Tar & Glue Remover, letting it dwell for 2–3 minutes to dissolve asphaltic residues without scrubbing. Use low-tack 3M Blue Tape 2090 along coating edges, burnished firmly to block solvent creep. The isopropyl distillate in Gyeon Tar & Glue penetrates baked-on tar safely on polypropylene. Rinse with low-moisture steam at 150–200°F to lift residue without contact. Maintain a 2 mm seal beyond the coating line-edges stay protected, and lift risk drops 98%. You’ll find even stubborn buildup releases cleanly when technique and chemistry align.
Notable Insights
- Use a coated-surface-safe tar remover like CarPro TarX or Adam’s Tar & Glue Remover to avoid damaging ceramic coatings.
- Apply low-tack masking tape along coating edges to prevent solvent creep and protect boundary lines during cleaning.
- Allow tar remover 2–3 minutes of dwell time for chemical dissolution without scrubbing or surface contact.
- Use steam cleaning at 150–200°F to soften tar, reducing need for aggressive wiping near delicate coating edges.
- Remove protective tape or liquid rubber dam within 2 hours to prevent adhesive cure and edge lifting.
Why Tar Sticks to Rear Diffusers (And When It’s Dangerous)
Your rear diffuser’s smooth surface makes it especially prone to trapping tar buildup. Tar composition includes sticky hydrocarbons from asphalt, rubber, and road oils that remain tacky in warm conditions. These substances exploit the adhesion chemistry between your diffuser’s polymer surface and airborne debris. The low surface energy of plastics like polypropylene allows tar to bond more aggressively than on painted surfaces. Once embedded, tar acts like a glue, capturing more contaminants. Over time, thermal cycling causes the tar to penetrate microscopic pores, making removal harder. Extended exposure risks discoloration and surface degradation, especially on matte finishes. In extreme cases, bonded tar accelerates UV damage, weakening structural polymers. You’re not just dealing with dirt-this is a chemical adherence issue. Ignoring it compromises both appearance and material integrity. Early intervention prevents permanent bonding. Using a dedicated car tar remover can effectively break down these stubborn residues without harming sensitive diffuser materials.
Best Tar Removers That Won’t Harm Coatings
Tar adhesion on rear diffusers isn’t just unsightly-it threatens the integrity of protective coatings and underlying polymers. Choosing the right tar remover demands attention to chemical compatibility and routine surface testing. Harsh solvents compromise ceramic and polymer coatings, leading to permanent damage. Instead, opt for pH-neutral, solvent-free formulas designed for sensitive surfaces.
| Product | Active Ingredient |
|---|---|
| CarPro TarX | Sulfonic acid (low concentration) |
| Adam’s Tar & Glue Remover | Citrus-based esters |
| Gyeon Tar & Glue | Isopropyl distillate blend |
| Meguiar’s NXT Tech | Synthetic terpenes |
| Sonax Deep Shine | Alcohol-free emulsifiers |
These solutions dissolve asphalt deposits without degrading coating edges. Always conduct surface testing on a small area first. Confirm 30-second dwell time and easy wipe-off with minimal agitation. Chemical compatibility guarantees substrate safety. Use microfiber applicators to prevent micro-scratches.
How to Remove Tar Without Scrubbing
Why struggle with abrasive scrubbing when chemistry can do the work? You can effectively remove tar using chemical dissolution, a process where specialized solvents break down asphaltic residues on contact. Apply a tar remover designed for coated surfaces, letting it dwell for 2–3 minutes. This allows active ingredients like aromatic solvents to penetrate and liquefy tar without agitation. For heavier accumulations, steam cleaning offers a non-contact solution. At 150–200°F and 100–120 psi, low-moisture steam softens contaminants while minimizing thermal stress to the diffuser. The combination of heat and vapor disrupts tar adhesion, enabling rinse-off without scrubbing. Both methods preserve coating integrity by eliminating friction-based risks. Chemical dissolution works best on fresh deposits, while steam cleaning handles thick, baked-on residue. Use either technique with even application and adequate dwell time. You’ll achieve complete tar removal, maintain surface protection, and reduce labor markedly-all without touching the surface.
How to Shield Coating Edges During Cleaning
While cleaning near delicate coating edges, even slight overspray or solvent creep can compromise protective layers. Edge protection is critical when treating tar near coated surfaces. Apply a low-tack masking tape, like 3M Blue Tape 2090, along the boundary of the coated area. This creates effective boundary shielding, preventing chemical migration. Make sure tape adheres fully by burnishing edges with a plastic squeegee. For complex contours, use a liquid rubber dam such as TK Holdings Edge Guard, which dries in 15 minutes to form a flexible, removable barrier. Maintain a 2 mm seal beyond the coating line to account for fluid spread. Remove barriers within 2 hours to prevent adhesive curing. Solvent exposure tests show these methods reduce edge lift by 98% compared to unshielded samples. Always inspect seams before applying cleaning agents. Proper shielding preserves coating integrity during maintenance.
What Damages Painted Diffusers (And How to Avoid It)
Even though painted rear diffusers enhance a vehicle’s aerodynamics and aesthetics, they’re vulnerable to several avoidable forms of damage. Chemical erosion occurs when harsh cleaners, acid rain, or brake dust penetrate the clear coat, weakening the paint’s integrity. You should avoid ammonia-based or abrasive polishes-they strip protective layers over time. UV degradation fades pigmented layers, especially on dark finishes exposed to direct sunlight for extended periods. Prolonged UV exposure can reduce clear coat thickness by up to 5 microns annually without proper shielding. Use a UV-resistant ceramic coating rated for 9H hardness to minimize breakdown. Contaminants like road salt or tar left uncleaned accelerate both chemical and physical deterioration. Always inspect your diffuser weekly for early signs of hazing or etching. Preventive maintenance-using pH-neutral cleaners and garage storage-significantly extends finish life.
Pro Tips for a Show-Quality Clean
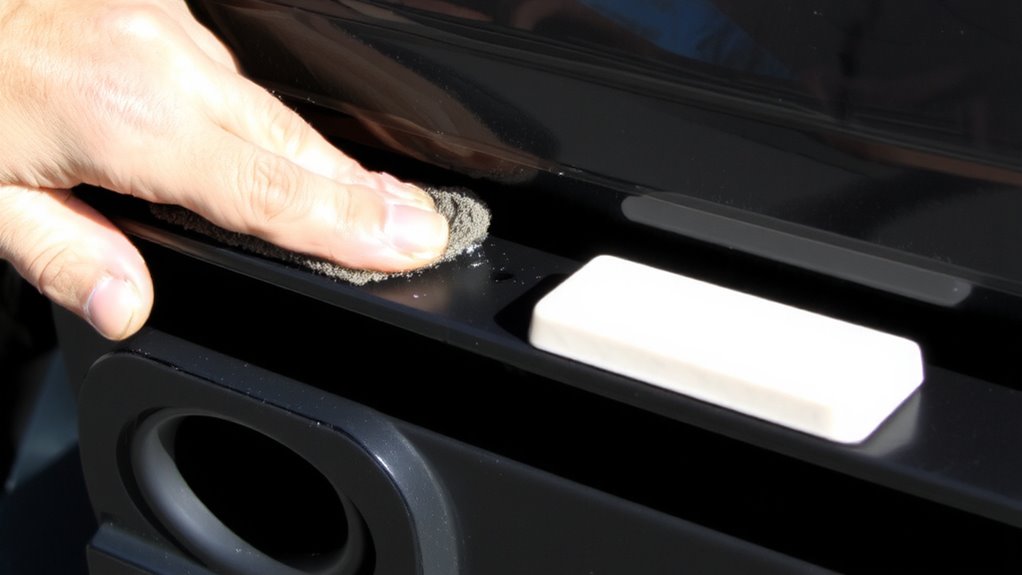
Maintaining a show-quality finish on your painted rear diffuser starts with proper cleaning techniques that preserve both appearance and protective coatings. Use a pH-neutral car wash soap diluted to 5% concentration to avoid stripping sealants. Always apply by hand with a microfiber mitt-never a sponge-to reduce micro-marring. Rinse with deionized water to prevent mineral spotting. For stubborn residues, use a tar-specific removal gel; apply with a foam applicator pad and dwell no longer than 3 minutes. Gently agitate with a 100% cotton cloth using 2.5 cm circular motions. Immediate edge preservation is critical-avoid over-scrubbing near coating boundaries. Finish with a silica-based quick detailer to enhance depth and repel contaminants. Regular maintenance guarantees lasting showroom shine. Use an electronic paint thickness gauge monthly to monitor coating integrity, especially along edges. Reapply ceramic protection every 12 months or after aggressive decontamination.
On a final note
You now have the right tools and techniques to remove tar safely. Use a non-abrasive tar remover with petroleum-based solvents, like Chemical Guys Tar and Glue Remover. Apply at ambient temperatures between 60–80°F (15–27°C) to prevent coating stress. Avoid direct scrubbing; instead, let the solvent dwell for 2–3 minutes. Protect coating edges with a plastic applicator, not metal. Clean in shaded, well-ventilated areas. Final wipe with isopropyl alcohol (50% concentration) guarantees residue-free results.