How to Replace Rear Brake Pads on a 2014 Subaru Legacy With Caliper Piston Reset
Lift your 2014 Subaru Legacy using a 3-ton floor jack at the rear factory lift point and secure it with 3,500 lb jack stands. Remove the wheel after loosening the 21mm lug nuts. Use a brake caliper tool to slowly turn the piston clockwise into the bore, checking master cylinder fluid levels. Replace pads with 54.5 mm NAO-spec units, ensuring shims and clips are seated. Reinstall the caliper and wheel, torquing lug nuts to 80 ft-lbs. A firm pedal and proper engagement mean you’re on the right track-there’s more to get right.
Notable Insights
- Lift the rear of the vehicle with a floor jack and secure it with jack stands before removing the wheel.
- Use a dedicated caliper tool to slowly retract the piston clockwise, monitoring brake fluid levels.
- Inspect rotor thickness and condition, replacing or resurfacing if below 18.0mm or damaged.
- Install new pads with correct alignment of shims and clips, ensuring full contact with piston and bracket.
- Reassemble caliper, remount wheel, torque bolts to spec, and test brakes for firmness and proper function.
Remove the Rear Wheel to Access the Caliper
Start by lifting the rear of your 2014 Subaru Legacy using a floor jack rated for at least 3 tons, positioning it at the factory-recommended lift point just behind the rear wheel arch. Once raised, secure the vehicle with jack stands rated for 3,500 pounds per stand. Perform wheel removal by loosening the lug nuts one-quarter turn with a 21mm wrench before lifting. Remove them completely after the tire is off the ground. Carefully pull the wheel straight off to avoid damaging the studs. With the wheel off, you gain direct access to the brake assembly for a thorough brake inspection. Examine the rotor thickness-minimum allowable is 18.0mm-and check pad wear. If pads measure less than 3mm, replacement is required. This step guarantees you diagnose wear accurately before disassembling the caliper.
Use a Brake Caliper Tool to Reset the Piston
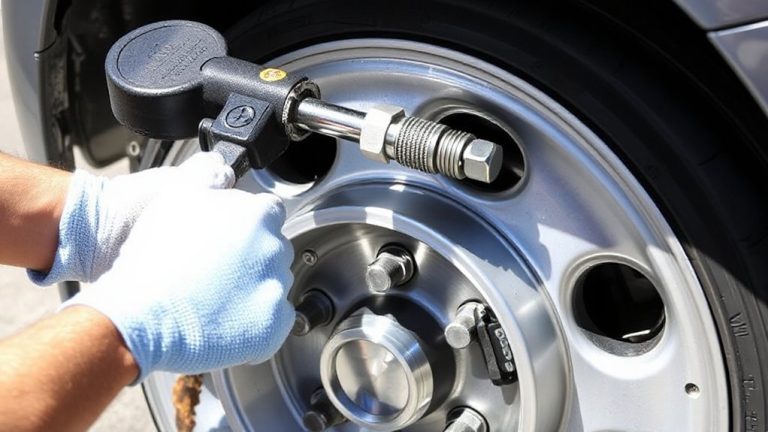
Before removing the caliper, you’ll need to retract the brake piston to accommodate the thicker new pads, and that means using a dedicated brake caliper tool. The piston resists pressure due to internal hydraulic force, so twisting the tool clockwise slowly compresses it back into the bore. Do not force it, or you risk damaging the caliper. As the piston retracts, displaced fluid increases the brake fluid level in the master cylinder reservoir. Check it frequently to prevent overflow-excess fluid can cause corrosion. While working, inspect the caliper slide pins for wear and binding. They must move freely to guarantee even pad wear. Clean them with brake cleaner and apply high-temperature grease before reassembly. Use a tool designed for Subaru models to match the piston’s square-thread pattern. Proper retraction guarantees correct caliper fitment over the new pads.
Replace Rear Brake Pads on a 2014 Subaru Legacy
Now you’re ready to install the new rear brake pads on your 2014 Subaru Legacy. Remove the old pads and confirm the new ones match OEM specifications: 54.5 mm thickness, NAO compound, with a wear indicator slot. Proper alignment of the anti-squeal shim and retaining clips is critical-misalignment causes noise and uneven brake pad wear. Before installation, perform a rotor inspection. Check for scoring, warping, or thickness variation below the minimum spec of 9.0 mm. Surface runout should not exceed 0.05 mm when measured with a dial indicator. If deep grooves or cracks are present, resurface or replace the rotor. Install the inner and outer pads securely into the caliper bracket, ensuring full contact with the piston and abutment points. This guarantees even clamping force and maximum braking performance.
Reassemble the Caliper and Reinstall the Wheel
Once the new brake pads are securely in place, reattach the caliper to the knuckle using the mounting bolts, tightening them to the factory specification of 71 ft-lbs (96 Nm) with a torque wrench. Make sure the caliper aligns properly over the rotor to avoid binding. Reconnect the brake hose bracket bolt if equipped. Place the wheel back onto the hub, aligning the studs with the lug holes. Hand-thread the lug nuts to prevent cross-threading. Tighten them in a star pattern using a torque wrench to 80 ft-lbs (108 Nm). Check the brake fluid level-since the piston was compressed, excess fluid may remain, risking overflow. Top off or drain as needed. Verify the parking brake adjustment is correct to maintain proper pad clearance and prevent drag. A misadjusted parking brake can compromise brake performance and pad wear. Finish by reinstalling the wheel well liner, if removed.
Test the Brakes and Check for Proper Function
With the wheel securely tightened and all components back in place, it’s time to verify the brake system operates as intended. Start the engine and press the brake pedal several times to build pressure. The pedal should feel firm, not spongy-if it’s soft, air may remain in the lines. Check the brake fluid level in the reservoir; it should sit between the “MIN” and “MAX” marks. Low fluid could indicate incomplete piston reset or a leak. Test the parking brake adjustment by engaging it; it should hold the car on a slight incline with 5 to 7 clicks. Excessive travel means it needs tightening. Take the vehicle for a low-speed test drive in a safe area. Lightly apply the brakes to confirm even engagement and absence of noise or vibration. Proper function guarantees safety and performance. Document your findings and address any anomalies immediately.
On a final note
You’ve successfully replaced the rear brake pads and reset the caliper piston on your 2014 Subaru Legacy. The brake system now delivers consistent stopping power with a firm pedal feel. Confirm the caliper piston is fully seated into the bore-typically requiring 8–10 turns with a专用 tool. Verify brake fluid level in the reservoir is at the “MAX” line. Test drive at low speed, checking for noise, vibration, or sponginess. Properly maintained, Subaru’s semi-metallic rear pads offer 40,000 miles of reliable performance.