The Complete Guide to Installing Threaded Lowering Springs Without Damaging Strut Assemblies
You must install threaded lowering springs with precision to avoid strut damage. Use an internal or external spring compressor rated for your coil type, with safety locks engaged. Match spring inner diameter to perch size-typically 2.5–3.0 inches-and guarantee coil ends seat against machined tabs on the sleeve. Compress gradually, alternating sides every quarter-turn. Never exceed the manufacturer’s compressed length. Proper alignment prevents uneven load, heat buildup, and premature wear-key factors in maintaining strut integrity. Further details reveal even more critical alignment and torque specifications.
Notable Insights
- Always use a proper spring compressor with safety locks to control high tension during disassembly and assembly.
- Match the spring’s inner diameter precisely to the strut perch diameter to ensure correct seating and load distribution.
- Compress springs gradually and symmetrically, alternating compressor turns to prevent coil misalignment or bind.
- Verify coil ends align with machined steps or tabs on the threaded sleeve for secure upper and lower seat engagement.
- Release compressed springs slowly under light tension to allow natural settling and avoid strut piston damage.
How Threaded Springs Risk Your Struts (And How to Prevent It)
While threaded lowering springs offer precise ride height adjustment, improper installation can lead to premature strut failure. You must guarantee correct spring seating to prevent misalignment. If the spring doesn’t seat fully into the strut perch, pressure concentrates on one area, creating uneven load distribution. This imbalance generates excessive heat and stress, accelerating wear on the strut’s internal components. Factory springs and aftermarket threaded units differ in coil pitch and spring rate, so forcing a mismatched spring risks damage. Verify that the spring’s inner diameter matches the perch diameter-typically 2.5 to 3.0 inches. Uneven load distribution mimics driving with underinflated tires: predictable failure follows. Always compress the spring just enough to install it without distorting coil alignment. Proper spring seating guarantees force spreads evenly across the strut. This maintains structural integrity and extends service life.
What Tools You Need for Safe Spring Compression
You can’t achieve proper spring seating without the right tools to safely compress the coil. Using improper equipment risks damage to both spring types and strut components. Always wear safety gear-gloves and impact-resistant glasses-because compressed springs store dangerous amounts of energy. For reliable performance and durability, consider investing in top automotive maintenance tools recommended by professionals.
| Tool | Purpose | Compatibility |
|---|---|---|
| Spring compressor (internal/external) | Applies even pressure to coil | All spring types, OEM and aftermarket |
| Torque wrench (½” drive) | Controls load during compression | 50–100 ft-lbs range |
| Socket set (metric) | Disassembles strut hardware | M10–M14 fasteners |
| Safety locks (included with compressors) | Secures coil during work | Mandatory with all compressors |
Use only compressors rated for your spring type. Hydraulic units add precision, but manual models offer better control. Never rely on strut mounts or springs to bear load during service.
How to Remove and Disassemble Struts
A strut is more than just a spring and shock combo-it’s a critical suspension component that maintains ride height, absorbs road impacts, and supports steering alignment. Before disassembly, use proper strut removal techniques: lift the vehicle securely, remove the wheel, then disconnect the sway bar link and strut-to-knuckle bolts. Support the knuckle to avoid stressing brake lines. Unbolt the strut from the steering knuckle and carefully pull it out. Once removed, clean the assembly thoroughly. Always follow disassembly precautions: never assume the spring is unloaded, and avoid prying or hammering on the strut body. Inspect the piston rod for scoring and check mount integrity. Label components to maintain orientation. Store parts in order to simplify reassembly. Proper handling prevents damage and guarantees accurate reinstallation.
How to Compress Springs Safely
Always use a proper spring compressor when dealing with threaded lowering springs-your safety depends on it. These springs store immense spring tension, and sudden release can cause serious injury. Position the compressor arms symmetrically on opposite coils to distribute force evenly. Tighten slowly, a quarter-turn at a time, alternating sides to prevent binding or distortion. Never exceed the spring’s compressed length spec-typically listed by the manufacturer-to avoid coil bind, where coils touch and transfer shock directly to the strut. Coil bind reduces travel, increases stress, and can crack the strut housing. Use a dual-pin compressor designed for MacPherson struts for best control. Verify fit before tightening-misalignment risks slippage. Compress just enough to remove tension from the strut assembly. Keep your body clear during compression. Never rely on vehicle weight or improvised tools-precision tools guarantee consistent, safe operation. Safety and accuracy prevent costly damage.
Installing Lowering Springs on Threaded Sleeves
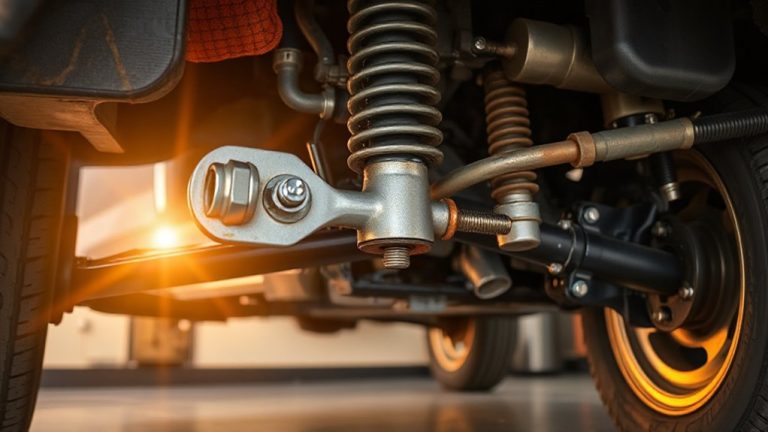
Once the spring is safely compressed, align it with the threaded sleeve on the strut body, making certain the coil ends seat properly against the upper and lower spring seats. Proper seat alignment prevents uneven loading and premature wear. Rotate the spring slowly into position, guiding each coil end into its designated seat. Misalignment can distort spring tension, leading to noise or failure. Most threaded sleeves feature machined steps or tabs that match the spring’s dead coils-use these for precise orientation. Maintain consistent spring tension during seating to avoid lateral shift. Apply light pressure while releasing the compressor to let the spring settle naturally into place. Confirm both ends are fully seated before removing the compressor. Correct installation guarantees peak ride height, handling response, and longevity. Never force the spring; improper fit increases stress on the strut tube and mounting points.
How to Reassemble and Reinstall Struts
While the springs are securely seated, you can begin reassembling the strut assembly with attention to proper component alignment. Start by reinstalling the strut cap, making sure the piston shaft is centered and the top mount is properly positioned. Misaligned components can compromise strut alignment and lead to premature wear or handling issues. Tighten the strut nut using a torque wrench set to the manufacturer’s torque specifications-typically 35–45 ft-lbs, depending on the vehicle. Under-torquing risks loosening; over-torquing may damage the piston shaft. Reassemble dust and bump stops in their correct order and positions per factory layout. Once fully reassembled, carefully reinstall the strut into the vehicle’s knuckle and fender mount. Confirm fitment is flush and all bolts are present. Proper strut alignment during reinstallation makes certain of even tire wear and best suspension geometry.
Mistakes That Wreck Lowering Spring Installations
Skipping proper procedures during reassembly can compromise the entire lowering spring installation, leading to avoidable failures down the road. Forgetting spring alignment risks coil bind, where the spring’s coils touch under compression, reducing travel by up to 1.2 inches and increasing stress on components. You must center the spring precisely on the upper and lower seats to maintain even load distribution. Misalignment introduces uneven forces that degrade strut stability over time. Always torque the strut nut to factory specs-typically 18–22 ft-lbs-to secure the assembly. Over-tightening can deform the mount; under-tightening lets parts shift, causing clunking and wear. Never drop the vehicle’s weight on compressed springs-support the strut during install. Poor strut stability leads to poor handling, accelerated tire wear, and potential failure. Double-check every step.
On a final note
You’ve minimized strut damage risk by using precision tools and proper compression techniques. Thread protec springs require exact preload settings-typically 12–18 mm of thread engagement-to maintain structural integrity. Always torque strut bolts to manufacturer specs, usually 65–85 ft-lbs. Misalignment or uneven pressure causes premature wear. Your installation now delivers controlled ride height and ideal spring seating, ensuring long-term performance and safety without compromising suspension geometry or damping function.