How to Wax Aluminum Trim Without Causing Oxidation
Wash your aluminum trim with a pH-neutral cleaner (6.5–7.5) to prevent etching, then rinse with distilled water. Use a metal-specific, pH-neutral wax with polymers-never automotive waxes with abrasives. Strip oxidation with oxalic acid if needed. Apply wax in thin, even layers using a microfiber applicator, and buff with a 300+ GSM cloth after 3–5 minutes. Reapply monthly. Following these exact steps guarantees long-term protection and reveals even greater detail in surface care.
Notable Insights
- Use a pH-neutral wax (pH 6.5–7.5) specifically formulated for aluminum to prevent oxidation and surface damage.
- Clean the aluminum trim with a pH-neutral cleaner and rinse with distilled water before waxing to remove contaminants.
- Remove existing oxidation with an aluminum-safe cleaner containing phosphoric or oxalic acid before applying wax.
- Apply a thin, even layer of metal-specific wax using a microfiber applicator in shaded conditions to avoid streaking.
- Buff with a high-quality microfiber cloth after 3–5 minutes of curing to achieve a haze-free finish and inspect under direct light.
Wash Aluminum Trim With a pH-Neutral Cleaner
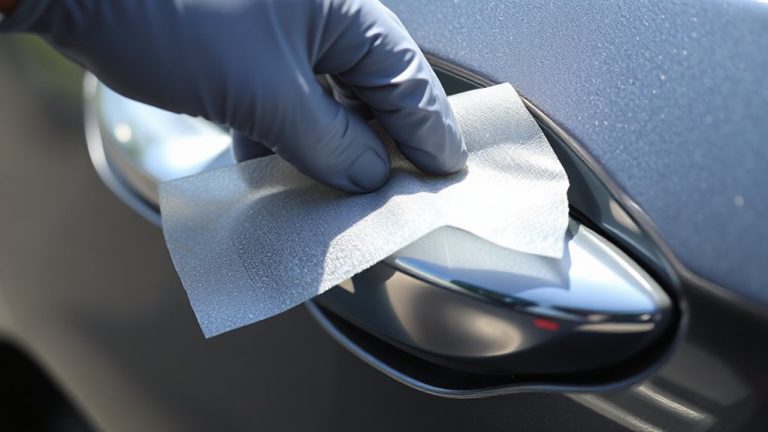
Start by washing the aluminum trim with a pH-neutral cleaner to remove dirt, grease, and contaminants without damaging the surface. Use a cleaner with a pH between 6.5 and 7.5 to avoid etching or corrosion. Hard water, caused by high water hardness, leaves mineral deposits that interfere with adhesion, so use distilled or deionized water when rinsing. Cleaning frequency depends on environmental exposure; trim in coastal or industrial areas needs washing every two weeks, while stable environments allow monthly maintenance. Apply the cleaner with a microfiber mitt using circular motions at 300–500 grams of pressure per square inch. Rinse thoroughly, ensuring no residue remains. Inspect under direct sunlight at a 45-degree angle to verify uniform cleanliness. Proper preparation prevents oxidation and maximizes wax performance. This step is critical-skipping it reduces wax adhesion by up to 60%. For severely oxidized surfaces, consider using an aluminum brightener to restore luster before waxing.
Choose a Wax Formulated for Metal Surfaces
The right wax acts as a protective barrier, and for aluminum trim, that means choosing a product specifically formulated for metal surfaces. These waxes offer proven metal compatibility, guaranteeing they won’t react with or corrode aluminum. Look for pH-neutral formulas with a rating between 6.5 and 7.5 to prevent oxidation. Surface adhesion is critical-opt for waxes containing polymers or silicones that bond tightly to smooth metal. Carnauba-based blends alone may not adhere well or last. Synthetic sealants provide longer protection, often up to six months. Apply thin, even layers with a microfiber applicator; thick coats invite streaking and trapping moisture. Avoid automotive waxes with abrasives or solvents meant for paint. Instead, select products labeled for aluminum or non-ferrous metals. Proper formulation guarantees durability, shine, and defense against UV and environmental exposure.
Remove Oxidation and Old Wax Residue First
Oxidation and built-up wax residue are the main barriers to a clean, long-lasting finish on aluminum trim. You must remove both before applying any wax. Oxidation appears as a chalky white or dull gray film, weakening the metal’s surface reflectivity. Start with chemical stripping using a dedicated aluminum cleaner containing phosphoric or oxalic acid to dissolve oxidation and old coatings. Apply with a microfiber cloth, following dwell time instructions-usually 2–5 minutes-to avoid surface damage. Rinse thoroughly with water and dry completely. Follow with abrasive polishing if pitting or stubborn stains remain. Use a non-woven pad with 1,500–2,000 grit equivalence, working in small sections to avoid overheating. This step smooths microscopic imperfections, restoring luster. Never use steel wool or aggressive sanding-it damages the soft metal. Proper prep guarantees the wax bonds directly to clean aluminum, enhancing protection and shine. Some rust removers designed for automotive use can also effectively address light surface oxidation on aluminum, especially those formulated with phosphoric acid.
Apply Aluminum-Safe Wax in Thin Layers
Once the aluminum is fully prepped and free of contaminants, it’s time to apply a wax formulated specifically for metal surfaces. Wax application requires precision to prevent buildup and guarantee protection. Always apply aluminum-safe wax in thin layers using a microfiber applicator pad. Thick coats lead to streaking and residue, reducing clarity and adhesion. Thin layers cure evenly and offer superior UV resistance. Allow 3–5 minutes of dwell time between coats, depending on humidity and temperature.
| Application Step | Benefit |
|---|---|
| Use circular motions | Guarantees even coverage |
| Apply in shaded area | Prevents premature drying |
| Maintain thin layers | Reduces buffing effort |
| Limit wax application to 2 coats | Avoids hazing and excess buildup |
Multiple thin layers outperform a single heavy coat. This method extends protection up to 6 months under normal conditions.
Buff With a Soft Cloth for Lasting Shine
After the wax has cured for 3–5 minutes, buff the surface using a clean, 100% microfiber cloth with a weave density of at least 300 GSM for best results. Proper buffing techniques are critical to achieving uniform shine preservation. Use circular motions with light to moderate pressure to avoid micro-scratches. A high-density microfiber cloth lifts residual wax without abrading the aluminum surface. Change cloth sections frequently to prevent wax redeposit. Inadequate buffing leaves haze, reducing reflectivity and clarity. Microfiber cloths with split fibers trap wax particles effectively, unlike cotton or low-grade fabrics. Completing this step thoroughly guarantees a deep, glossy finish that enhances trim appearance. Effective shine preservation depends on both wax quality and your buffing method. Consistent technique improves long-term results and surface protection. Final luster should appear even, not streaked or cloudy. Always inspect under direct light to confirm coverage. For optimal results, consider using a dedicated aluminum wheel cleaner to remove brake dust and grime before waxing.
Protect Trim Monthly to Prevent Oxidation
You’ve just finished buffing the aluminum trim to a high-gloss finish, and now it’s time to lock in that protection with a consistent schedule. Monthly maintenance is essential for lasting aluminum protection and preventing oxidation. Apply a quality sealant every 30 days to form a durable barrier against moisture and UV exposure. Below is a monthly care guide to visualize the process:
| Month | Task | Product Type |
|---|---|---|
| 1 | Clean & apply sealant | Polymer-based wax |
| 2 | Inspect for oxidation | pH-neutral cleaner |
| 3 | Reapply protective coat | Synthetic sealant |
| 4 | Dry wipe & assess shine | Microfiber cloth |
| 5 | Deep clean if needed | Aluminum-specific gel |
This routine guarantees maximum defense. Consistent aluminum protection blocks corrosive elements. Skip a month, and microscopic pitting may begin. Stick to the plan for flawless, oxidation-free trim year-round.
On a final note
You’ve cleaned, prepped, and applied wax correctly. Use a pH-neutral cleaner to avoid surface damage. Now, apply a silicon-free, carnauba-based metal wax in 2-inch circular motions. Buff immediately with a microfiber cloth (300–400 GSM) to prevent hazing. Reapply every 30 days. This maintains a protective layer up to 0.5 microns thick, blocking UV and moisture. Consistent maintenance inhibits oxidation.