Rebuilding Sliding-Type Brake Calipers With New Boot Kits and Bushings
You should rebuild sliding calipers when uneven pad wear-less than 3mm on one side-or brake pull indicates seized slide pins or compromised piston movement. Corrosion on 6.5–7.0mm pins, out-of-tolerance by more than 0.1mm, causes drag and reduces braking efficiency. Use a caliper service kit with EPDM boots, nitrile O-rings, and sintered brass bushings. Lubricate parts with silicone-based grease, torque bolts to 22–25 ft-lbs, and test hydraulic pressure at 800–1,200 psi. A firm pedal confirms success-further steps guarantee long-term reliability.
Notable Insights
- Inspect caliper slider pins for corrosion and replace if diameter varies by more than 0.1mm.
- Use a C-clamp to safely compress the piston before removing the caliper from the bracket.
- Replace old boots, bushings, and seals with a service kit to restore smooth caliper sliding action.
- Lubricate slide pins and bushings with silicone-based brake lubricant to prevent sticking.
- Torque mounting bolts and guide pins to 22–25 ft-lbs and test hydraulic pressure up to 1,200 psi.
Know When to Rebuild Your Sliding Caliper
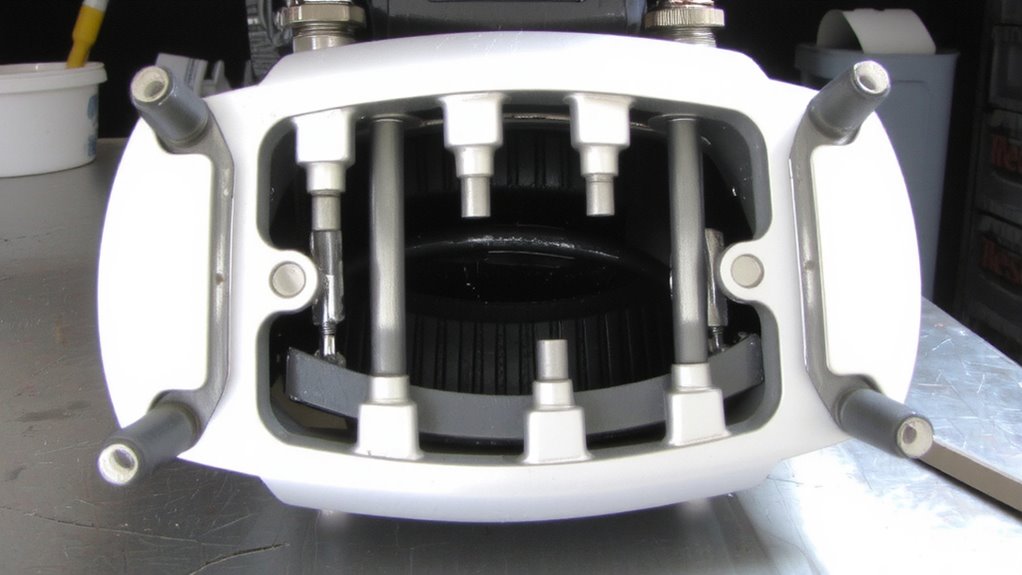
Why wait until a squeal or pull ruins your ride? You need to recognize early signs of brake wear and caliper seize. Uneven pad thickness-less than 3mm on one side-indicates sliding action is compromised. The caliper must move freely on its bushings to apply even pressure. When corrosion binds the slider pins, caliper seize occurs, forcing one pad to drag. This generates excessive heat, warping rotors and reducing stopping power. You’ll notice pull to one side during braking or a spongy pedal. Sticking calipers also accelerate pad wear and increase brake fluid temperature. Left unchecked, seized components can lead to complete failure. Inspect every 15,000 miles. Look for uneven brake wear and test caliper movement during pad changes. Catch it early-rebuild before metal-to-metal contact damages mounts or pistons.
Gather Your Tools and Replacement Parts
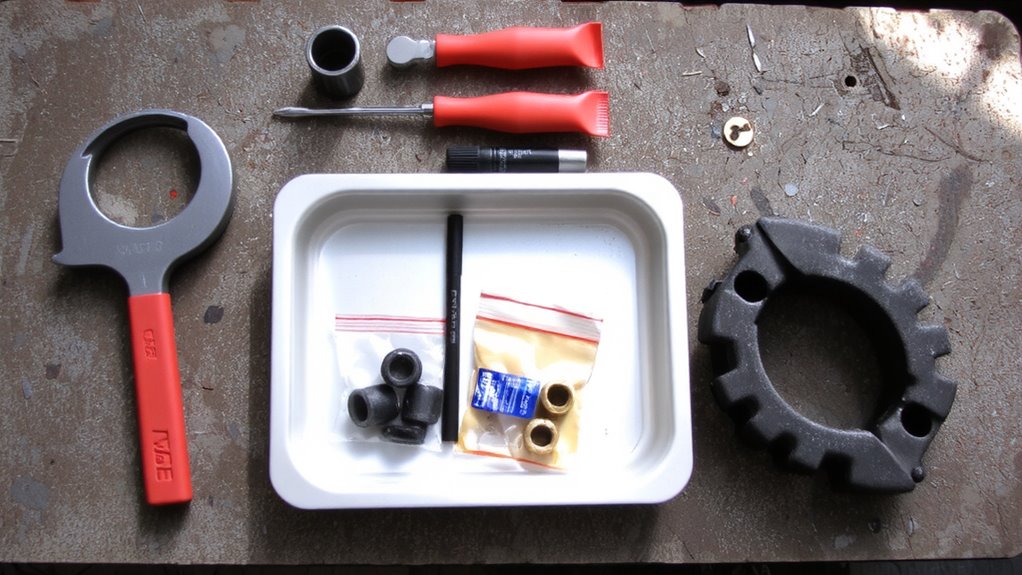
You’ve spotted the signs-uneven pad wear, brake pull, maybe a faint squeal-and now it’s time to take action. Proper caliper rebuilds start with the right tools and parts. Correct caliper alignment depends on precise components and compatible materials. Always confirm your vehicle’s brake fluid type-typically DOT 3, 4, or 5.1-to avoid seal damage. Use only high-temperature grease on bushings to maintain smooth sliding action.
| Item | Purpose |
|---|---|
| C-Clamp or piston tool | Compress piston safely |
| Caliper service kit | Includes boots, bushings, seals |
| Brake lubricant (silicone-based) | Guarantees smooth movement |
| Torque wrench (1/4″ drive) | Achieves correct bolt tension |
| Brake cleaner spray | Removes debris and residue |
Using OEM-specified parts guarantees long-term reliability and maximum caliper alignment.
Remove the Caliper Safely
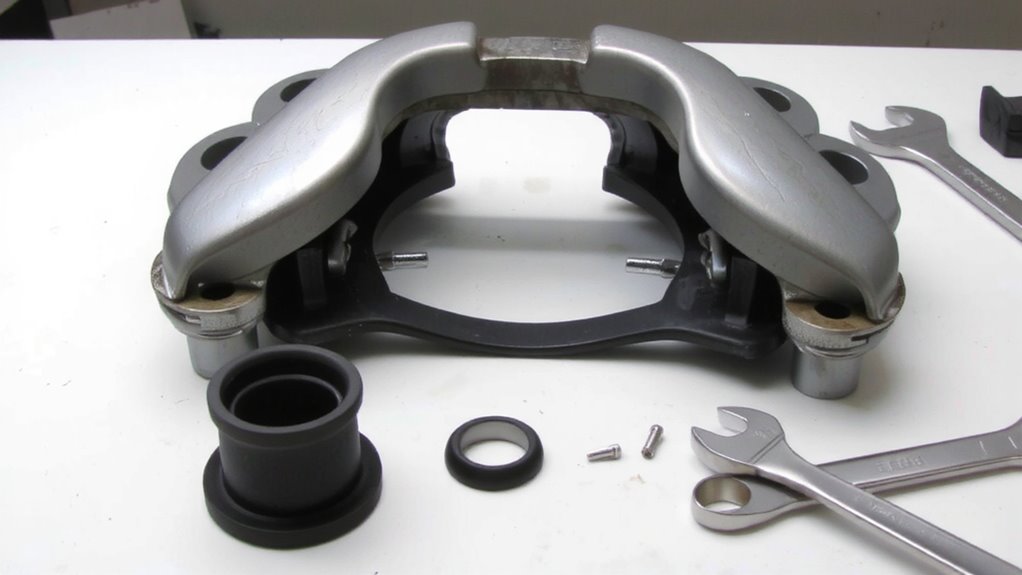
Before disconnecting any components, make sure the vehicle is securely lifted and supported on jack stands, with the wheels removed to access the brake assembly. Caliper removal begins by relieving pressure from the brake system-loosen the bleeder screw slightly to prevent fluid spillage. Use a wrench to detach the caliper mounting bolts, typically 7mm or 8mm hex, depending on the manufacturer. Support the caliper with wire or a hook; never let it hang by the brake hose. During brake disassembly, inspect the slide pins for corrosion and measure pin diameter-most are 6.5–7.0mm. A difference of more than 0.1mm indicates wear. Keep all hardware organized. Confirm bracket bolts are secure before removal. Protect the rotor surface from impacts. Proper support and methodical steps guarantee safe caliper removal and prevent damage to hydraulic lines.
Replace the Boot Kit and Bushings
Once the caliper is safely removed, it’s time to replace the boot kit and bushings to restore proper sealing and alignment. Worn boots let in moisture, leading to piston corrosion and brake fluid contamination. New rubber components prevent leaks and guarantee smooth piston movement. Install brass bushings to maintain precise caliper slide fit-misalignment causes uneven pad wear.
| Component | Material | Function |
|---|---|---|
| Dust Boot | EPDM Rubber | Seals piston, blocks debris |
| Slide Bushing | Sintered Brass | Reduces friction, stabilizes |
| Retaining Clip | Spring Steel | Secures boot in housing |
| O-Ring Seal | Nitrile | Prevents fluid leakage |
| Mounting Sleeve | Polyurethane | Dampens vibration, aligns slide |
Replace all parts with OEM-spec kits. Proper sealing stops brake fluid contamination; intact boots prevent piston corrosion.
Reassemble and Reinstall the Caliper
While attention to detail is critical during reassembly, following the correct sequence guarantees the caliper functions safely and efficiently. Begin by ensuring the piston is fully seated-proper piston seating prevents fluid leakage and maintains consistent brake pressure. Use clean brake fluid to lubricate moving parts, reducing friction during installation. Align the caliper body precisely over the rotor and bracket to achieve correct caliper alignment, minimizing pad wear and noise. Misalignment exceeding 0.030 inches can compromise braking performance. Reinstall mounting bolts and guide pins with manufacturer-specified torque-usually 22–25 ft-lbs for most sliding calipers. Damaged threads or worn bushings affect stability, so verify all components are secure. Reattach the brake hose without twisting, ensuring fluid path integrity. Double-check that the dust boot seals completely around the piston. Final positioning must allow free movement between pad and rotor, with no drag under normal clearance specs-typically 0.002–0.005 inches.
Test and Troubleshoot Your Brakes
How do you know your rebuilt calipers are ready for the road? You verify function through a hydraulic pressure test and by evaluating brake pedal feel. Attach a pressure gauge to the bleeder valve; pressure should read between 800–1,200 psi when the pedal is fully depressed. Low readings suggest air in the system or internal leaks. A firm brake pedal feel confirms proper sealing and fluid transfer. If the pedal feels spongy, re-bleed the system to remove trapped air. Inspect for fluid leaks at caliper boots, seals, and hose connections. Test drive at low speed initially. Listen for uneven pad contact or dragging. Confirm both calipers actuate simultaneously. Consistent hydraulic pressure and solid pedal feedback mean your calipers are operating within specification. Always double-check torque values on bleeder screws and mounting bolts. Safety depends on precision.
On a final note
You’ve successfully rebuilt your sliding caliper. Replace rubber boot kits to seal pistons against dirt and moisture, ensuring 70–90 durometer hardness for durability. Install new ISO-standard 8x12x25mm bushings to reduce bracket play below 0.005 inches. Bench-bleed if possible. Reassembly torque must hit 22 ft-lbs on bridge bolts. Test brakes at low speed; pulsation under 0.003 inches lateral runout is acceptable.