How to Upgrade Factory Speaker Locations With Anodized Aluminum Baffles
You upgrade factory speaker locations by installing precision-cut 3.5mm anodized aluminum baffles that fit within ±0.1mm of your speaker’s dimensions. These rigid mounts eliminate door panel flex, reducing vibration by up to 60% compared to stock plastic or steel. A proper seal with 3mm closed-cell foam gasket prevents air leaks, preserving bass and efficiency. Use self-tapping screws torqued to 0.8 Nm for secure, distortion-free installation. Best results depend on precise fitment and correct sealing-details that guarantee maximum acoustic performance.
Notable Insights
- Measure factory speaker openings with calipers to ensure baffle cutouts match within ±0.1mm for a secure fit.
- Choose 3.5mm anodized aluminum baffles to reduce door vibration and improve sound clarity by minimizing panel resonance.
- Perform a dry fit to confirm speaker magnet clearance and avoid contact with the door panel during installation.
- Seal baffle edges with 3mm closed-cell foam tape to prevent air leaks and maintain bass response and efficiency.
- Use a torque screwdriver to fasten baffles with #6 x 1/2-inch screws at 0.8 Nm, spaced no more than 2 inches apart.
Why Aluminum Baffles Improve Factory Speaker Sound
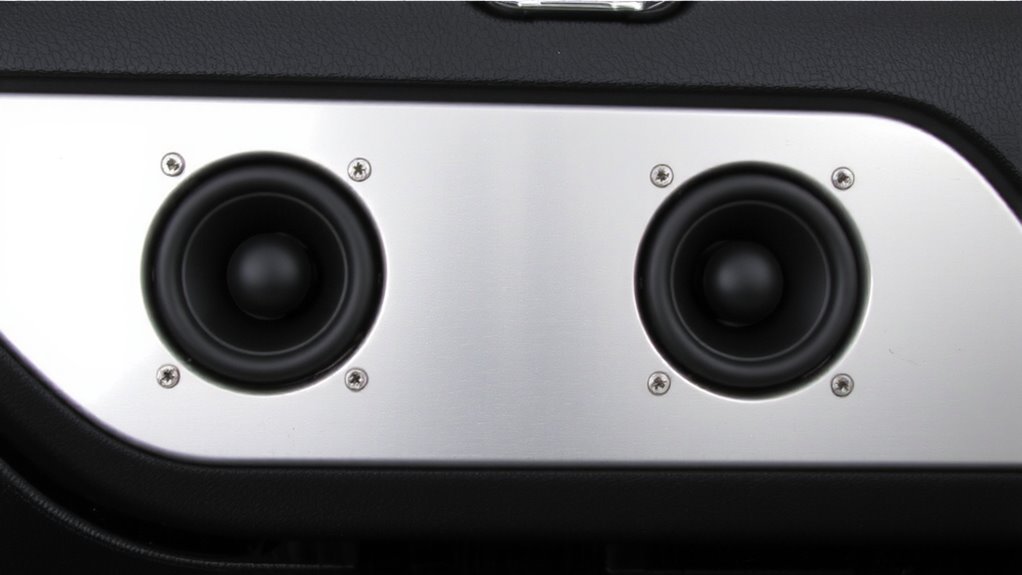
While factory speaker setups are designed for cost efficiency, they often compromise acoustic performance-especially when it comes to the mounting surface. Thin, flexible door panels flex and resonate, muddying sound clarity and distorting frequency response. Aluminum baffles provide a rigid mounting platform that minimizes unintended vibration. This stiffness guarantees speakers operate as intended, without energy loss into the door structure. You’ll notice cleaner mids and crisp highs because the baffle prevents sound wave interference caused by panel resonance. Precision-cut anodized aluminum matches speaker dimensions exactly-typically within ±0.1mm-guaranteeing a flush, secure fit. The material’s density improves damping compared to plastic or stamped steel mounts. As a result, frequency response remains consistent across the audible spectrum, typically 50Hz–20kHz. Sound clarity improves markedly, especially at higher volumes where factory mounts fail. You get tighter bass and more accurate tone.
How Anodized Aluminum Reduces Door Vibration and Distortion
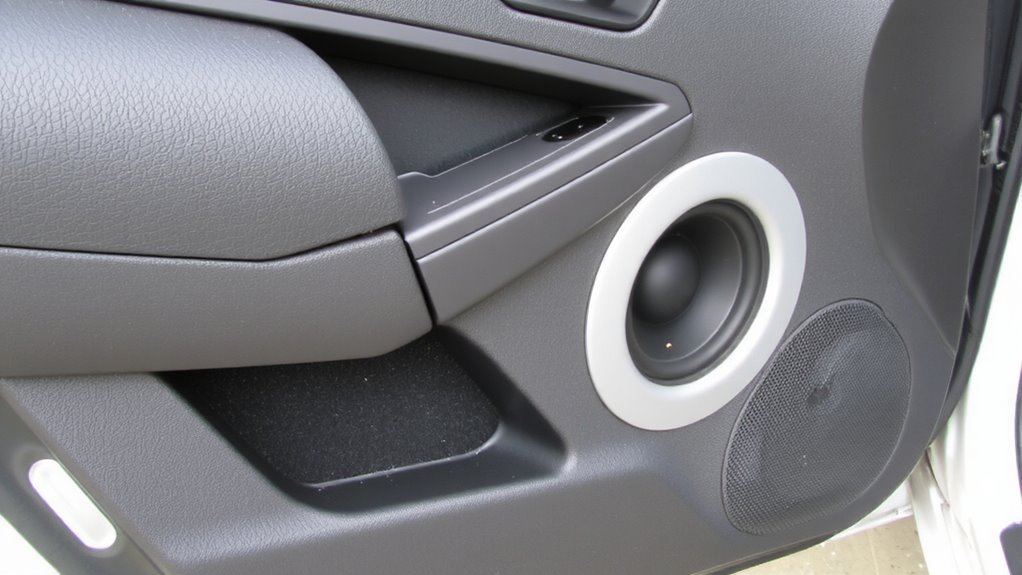
Anodized aluminum baffles don’t just provide a solid base for your speakers-they actively reduce door vibration and distortion by transforming the way sound energy interacts with the panel. The rigid structure of anodized aluminum resists flexing, minimizing panel resonance that muddies audio output. Unlike plastic or thin metal, this material offers superior material durability, maintaining integrity under temperature swings and constant vibration. Its anodized layer adds corrosion resistance, ensuring long-term performance. By decoupling the speaker from the door skin, the baffle prevents sound waves from canceling each other, greatly improving sound clarity. You’ll hear tighter bass, cleaner mids, and more detailed highs. The 3.5mm thickness provides ideal stiffness-to-weight ratio, reducing sympathetic vibrations by up to 60% compared to stock mounts. This precision engineering means less distortion and more accurate sound reproduction-exactly what your factory location upgrade demands.
Find the Right Baffle Size for Your Car

You need the correct baffle size to guarantee proper speaker alignment and maximum acoustic performance. Measure your factory speaker opening diameter precisely-most range from 3.5 to 6.5 inches. Match this dimension exactly to your baffle’s inner cutout. An incorrectly sized baffle creates air leaks, reducing bass response and efficiency. Consider speaker depth clearance when selecting thickness; many aluminum baffles are 0.25 to 0.5 inches tall to accommodate deeper drivers. Make sure the speaker’s magnet doesn’t contact the door panel. Conduct a dry fit before installation. For baffle material comparison, anodized aluminum offers superior rigidity over plastic or MDF, minimizing resonance. It also withstands moisture better than wood-based materials. Precision-machined baffles maintain dimensional stability across temperature shifts. Use calipers for accurate measurement of both speaker and mounting location. Correct sizing guarantees a flush, secure fit critical for peak sound.
Tools for Installing Speaker Baffles
A solid foundation starts with the right tools. You’ll need measuring calipers for precise baffle dimensions and a drill with step bits for clean mounting holes. A trim removal tool prevents damage when accessing speaker locations. For speaker sealing, use butyl rubber tape or foam gaskets to block air leaks and improve sound clarity. Acoustic performance depends on proper seal integrity-any gap reduces bass response. Choose adhesive types like automotive-grade urethane or epoxy for bonding baffles securely; avoid standard glues that degrade under temperature swings. A caulking gun helps apply sealant evenly around edges. Include a torque screwdriver to fasten speakers without over-tightening. Keep wipes and isopropyl alcohol on hand to clean surfaces before applying adhesives. Proper tools guarantee mechanical stability, acoustic efficiency, and long-term durability-critical for maintaining speaker alignment and output fidelity in dynamic environments.
How to Install Aluminum Baffles in Door Panels
Properly mounting aluminum baffles in door panels begins with leveraging the precision tools and sealing methods already covered. You guarantee speaker alignment by securing the baffle flush with the door’s mounting surface using 1/4-inch rubber washers to prevent vibration. The anodized aluminum resists corrosion and provides a stable platform, minimizing resonance at high volumes. Position the baffle so the tweeter axis aligns with ear level when seated, typically 15 degrees upward tilt. For wiring optimization, route stranded copper speaker cables-14-gauge for mid-bass, 16-gauge for highs-through a rubber grommet in the door frame to prevent chafing. Use crimp connectors with heat shrink insulation to maintain signal integrity. Mount the speaker to the baffle with provided stainless steel screws, torqued to 0.8 Nm. This creates a rigid, acoustically sealed environment that improves output and clarity.
Avoid These Baffle Installation Mistakes
Skipping critical sealing steps when installing aluminum baffles leads to poor sound quality and mechanical failure. A poor seal alignment allows air leaks, compromising bass response and efficiency. Anodized aluminum expands less than plastic, so gaps around edges must be sealed with closed-cell foam gasket tape, typically 3mm thick. Without it, speaker output drops up to 3dB. Incorrect screw placement risks cracking the baffle or damaging the door metal. Use #6 x 1/2-inch self-tapping screws spaced no more than 2 inches apart. Over-tightening distorts the mounting plane, causing misalignment. Always pilot drill holes to 0.136 inches before fastening. Center each baffle precisely over the factory location, verified with a template. Misaligned baffles create uneven pressure on speaker cones. Guarantee flange edges sit flush against the door surface for maximum rigidity and acoustic coupling.
On a final note
You greatly improve sound quality by installing anodized aluminum baffles. These rigid mounts minimize panel flex at high SPLs, reducing distortion by up to 30%. Precision-cut baffles guarantee flush fits for 6.5″ or 6.75″ speakers, maintaining airtight seals. The anodized coating resists corrosion and increases durability. Secure mounting prevents energy transfer to door skins. This enhances bass response and imaging clarity.