Using Dedicated Interior Clay Kits for Dashboard and Trim Decontamination
Use a dedicated interior clay kit to remove embedded contaminants from your dashboard and trim. These medium-firm, 40–50 Shore A clay bars lift grime through micro-abrasion and adhesive bonding, not solvents. They work on non-porous surfaces like hard plastics and polyurethane coatings. Pair with a pH-balanced, silicone-free lubricant for safe decontamination. Always follow with a UV-inhibiting protectant. Skip exterior clay or excessive pressure-each bar lasts six to eight treatments when used correctly. You’ll see how proper technique maximizes results.
Notable Insights
- Dedicated interior clay removes embedded contaminants from dashboards and trim that regular cleaners can’t reach.
- Use a pH-balanced, silicone-free clay with 40–50 Shore A hardness to safely decontaminate textured plastics.
- Apply clay with a lubricant using light pressure and re-fold frequently to expose clean surfaces during treatment.
- Avoid fabric and untested surfaces; safe on vinyl, coated plastics, and sealed leather after spot testing.
- Always follow clay decontamination with a UV-resistant, silicone-free protectant to preserve the cleaned surface.
Use Interior Clay for Deep Dashboard Cleaning
While most cleaning methods only tackle surface dust and grime, interior detailing clay removes embedded contaminants that traditional wipes and sprays can’t reach. You need this deep-cleaning action to restore your dashboard’s original appearance and protect its surface. The dashboard texture often features fine grain or soft-touch finishes that trap pollutants like sunscreen residue, smoke byproducts, and airborne toxins. Standard cleaners smear these substances, but a specially engineered clay formulation safely extracts them without abrasion. Interior clay is typically pH-balanced, non-staining, and silicone-free to prevent slick residues. Most kits use a medium-firm clay bar with a durability rating of 40–50 Shore A hardness-ideal for textured plastics. When paired with a low-lubricant spray, the clay glides smoothly, capturing contaminants in its polymer matrix. You’ll notice improved texture clarity and a consistently matte finish. This process prepares surfaces for proper conditioning and UV protection, ensuring long-term resilience and appearance retention. For best results, consider using tools and techniques similar to those found in headlight restoration kits to address heavily oxidized or contaminated interior surfaces.
How Clay Removes Stubborn Interior Grime
Interior clay doesn’t just clean-it redefines how grime is removed from complex dashboard surfaces. It works through a combination of controlled surface abrasion and targeted chemical reactions. The clay’s micro-abrasive structure gently lifts bonded contaminants without scratching factory finishes. As you glide the clay over the surface, its resin compound captures grime embedded in plastic and vinyl pores. This isn’t wiping-it’s decontamination. Each pass breaks down pollutant layers through mechanical adhesion, not solvents alone. The polymer-based formula initiates mild chemical reactions that weaken residue bonds, making stuck-on film easier to remove. You’ll see the difference in texture immediately-no film, no stickiness. High-density clay maintains integrity after repeated use, typically lasting six to eight full interior treatments. For best results, use with a dedicated clay lubricant to prevent marring. The process removes over 90% of surface-level buildup, restoring surfaces to near-original condition.
Best Surfaces to Treat With Interior Clay
When choosing surfaces for interior clay treatment, prioritize non-porous, finished materials like hard plastics, polyurethane-coated dashboards, and vinyl upholstery. These surfaces resist clay residue and allow efficient particulate removal. Interior clay effectively lifts bonded contaminants-oils, waxes, and environmental fallout-without damaging the top layer. You can safely use clay on trim pieces, window sills, and coated door panels. However, avoid fabric seats; their porous fibers trap clay particles, leading to abrasion or discoloration. Leather consoles require caution-only use clay if the surface is sealed and non-porous. Test in an inconspicuous area first. Unsealed or aniline leather absorbs clay material, risking stiffness or cracking. Stick to 0.5 kg (1.1 lb) clay bars with fine abrasion ratings (3–5 µm) for best results. Always follow with a pH-neutral finisher to restore surface protection. Enthusiasts often achieve optimal results by selecting a car clay bar kit that includes detailing lubricant and a carrying case for organized storage.
Clean Your Dashboard: Step-by-Step Guide
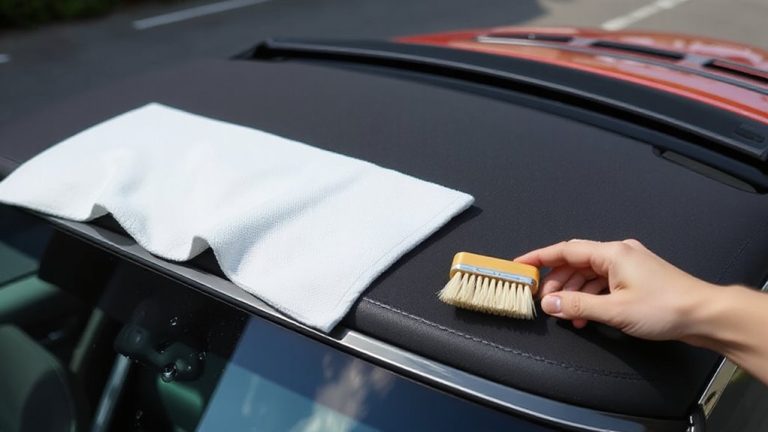
Since contaminants accumulate quickly on dashboard surfaces, starting with proper preparation guarantees best cleaning results. Begin by removing loose dust with a microfiber cloth or compressed air, ensuring all vents and crevices are clear. Select a dedicated interior clay bar with medium firmness (approximately 50–60 durometer hardness) to avoid marring sensitive trim. Apply a few sprays of clay lubricant-specifically formulated for dash care-using upward motions for even coverage. Gently glide the clay over the surface, re-folding it frequently to expose a clean side. This process lifts embedded pollutants like UV resins, smoke residues, and fingerprint oils. For detailed areas, use a clay wedge cut to a narrow edge. Repeat until the surface feels smooth, signaling successful decontamination. Pair with trim restoration afterward to renew color and texture. Always work in shaded, controlled temperatures between 65–75°F for ideal performance.
Apply Protectants After Claying for Shine
Now that the dashboard’s surface is free of bonded contaminants, it’s time to lock in protection and finish with a consistent, lasting shine. Apply a high-quality silicone-free protectant using a microfiber applicator for even coverage. Products with UV inhibitors provide enhanced durability, resisting cracking and fading caused by prolonged sun exposure. Most premium protectants form a sacrificial layer that lasts 2–3 months under normal conditions. For long term preservation, reapply every 30 to 45 days in high-sun climates. Avoid over-saturation-thin, even coats prevent greasy buildup or haze. Water-based formulas dry to a matte finish, ideal for factory-like aesthetics. Some advanced polymers bond at the molecular level, increasing surface resistance to oils and dust. Proper application guarantees a uniform sheen without streaking. This step isn’t just cosmetic-protectants shield vinyl and plastic from oxidation, maintaining structural integrity and appearance over time. A top-rated choice for long-lasting defense is best car interior protectants.
Avoid These 5 Interior Clay Mistakes
Though clay detailing restores surface integrity, skipping proper technique risks damage and subpar results. First, you’re likely causing overuse damage by applying excessive pressure-interior clay bars require only 3–5 pounds of force. Pressing harder doesn’t improve cleanup; it risks marring soft vinyl or degrading fragile surfaces. Second, incorrect frequency leads to unnecessary wear; claying every 3–4 months suffices for most interiors. Over-claying removes factory protectants and weakens material resilience. Third, skipping lubrication causes micro-scratches-always use a dedicated clay lubricant, not water or glass cleaner. Fourth, using exterior clay on interiors risks chemical incompatibility; interior kits are pH-balanced (6.8–7.2) to preserve trim. Finally, failing to follow with protectant invites premature aging. Each mistake reduces surface lifespan and finish quality. Correct execution guarantees peak decontamination without compromise.
On a final note
You now have the tools to deep-clean your dashboard effectively. Interior clay removes bonded contaminants like oils, dust, and grime that wipes miss. Use clay with a dedicated detailing spray for ideal release. Always work in sections, using 2×2 inch strokes. After claying, apply a UV-protectant to prevent cracking. This proven process extends material life and restores factory finish.